As discussed earlier, the Unified CM provisioning and serviceability APIs are SOAP based. To build the web portal, you will leverage the same Python modules you used previously in this lab in addition to some additional modules to implement the logic for your front-end APIs.
In this section, you will review the following:
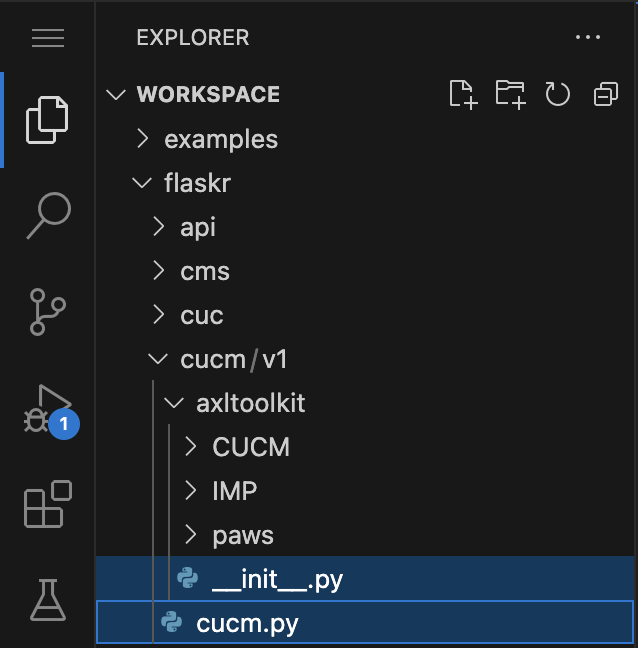
We are providing two Python modules, flaskr/cucm/v1/axltoolkit/__init__.py and flaskr/cucm/v1/cucm.py, in order to provide a common core framework allowing the portal server to make use of SOAP APIs. These modules use the Zeep Python library, which you have previously used in exercises. You may open these files as a reference via your VS Code Instance browser tab, using the Explorer. You will utilize several classes & methods from these modules in order to add functionality to your Web Portal. If you don't know what Python modules, classes, or methods are, don't worry. While understanding these concepts would help to understand the underlying code that we have provided for you, it is not necessary to be able to complete this lab.
Not all of classes or methods provided in these pre-built modules will be utilized in the web portal but we are providing them to you for future use.
The following describes in more detail the capabilities provided by these two modules.
These classes are designed to be generic so that you can take them and use them for your own projects if you wish. The Reference section of this lab has pointers to all of this source code that you can make use of. Note that this code is being provided as-is and it is up to you to ensure it provides the level of security and functionality you might need in your environment.
In order for the portal to connect to your Unified CM cluster, you must supply host names, HTTPS port number, and username and password for authentication. We have pre-configured a file that will be used to populate environment variables which will be read by various portal APIs that you will be implementing.
# Environment variables

# Participant pod number
POD_NUM='6'

# DEFAULT CUCM ACCESS INFO
CUCM_HOSTNAME=cucm1a.pod6.col.lab
CUCM_PORT=8443
CUCM_USERNAME=admin
CUCM_PASSWORD=C1sco.123

# DEFAULT CUC ACCESS INFO
CUC_HOSTNAME=cuc1a.pod6.col.lab
CUC_PORT=8443
CUC_USERNAME=admin
CUC_PASSWORD=C1sco.123

# DEFAULT CMS ACCESS INFO
CMS_HOSTNAME=cms1a.pod6.col.lab
CMS_PORT=8443
CMS_USERNAME=admin
CMS_PASSWORD=C1sco.123

# Service App settings (client_id, client_secret, and refresh_token)
In order to utilize the core CUCM SOAP API Python classes you need to instantiate them (AXL, PAWS, SXML) by providing the details of your CUCM server stored in environment variables which came from the .env file you just looked at. You will need to make use of the CUCM_HOSTNAME, CUCM_PORT, CUCM_USERNAME, and CUCM_PASSWORD variables.
When communicating with CUCM and other VOS-based UC applications (CUC, IM&P, etc) over web services based APIs (AXL, PAWS, SXML, REST), you must maintain a web connectivity session where the application can reuse the already established TLS connection as well as cache and re-use the JSESSIONID / JSESSIONIDSSO cookie(s) returned after a successful authentication. If you do not cache these authentication cookie(s) and do not send one with subsequent requests, each API request your provisioning portal makes will open a new session with the product. This may lead to large numbers of active sessions, which, in turn, can lead to overall system performance degradation. Although the Cisco Tomcat (the web server used on CUCM and other VOS-based products) web application sessions have a default timeout of 30 minutes, if the JSESSIONID & JSESSIONIDSSO cookies are not cached by the client and the request rate is high, Cisco Tomcat services will start to spike the CPU and deplete available memory, potentially leading to more serious issues on the server.
You can monitor Active Sessions on a per web application basis by monitoring the following CUCM performance counter:
\\cucm-host\Cisco Tomcat Web Application(axl)\SessionsActive
Performance degradation is also dependent on the request and response activity, but as a general rule active session count over a 100 is of concern. The Using JSESSIONIDSSO to improve performance page on developer.cisco.com has more information on this topic.
In Python you can easily achieve this persistent authentication cookie caching by utilizing the session object available within the Python Requests library https://requests.readthedocs.io/en/latest/user/advanced/#session-objects. The Python requests library is already utilized by the AxlToolkit module in the same way you did in the earlier exercises.
In order to maintain this persistent session object, you must instantiate the CUCM SOAP API Python classes globally in the flaskr/api/v1/cucm.py file. Follow these steps to create new variables and create new instances of the classes discussed earlier.
api = Namespace('cucm', description='Cisco Unified Communications Manager APIs')

# Read environment variables
cucm_host = getenv('CUCM_HOSTNAME')
cucm_user = getenv('CUCM_USERNAME')
cucm_pass = getenv('CUCM_PASSWORD')

# Core CUCM SOAP API Python Class Instances
myAXL = AXL(cucm_host, cucm_user, cucm_pass)
myPAWSVersionService = PAWS(cucm_host, cucm_user, cucm_pass, 'VersionService')
mySXMLRisPort70Service = SXML(cucm_host, cucm_user, cucm_pass, 'realtimeservice2')
mySXMLControlCenterServicesService = SXML(cucm_host, cucm_user, cucm_pass, 'controlcenterservice2')
mySXMLPerfMonService = SXML(cucm_host, cucm_user, cucm_pass, 'perfmonservice2')
###########################################
This code creates five variables, one for each of the SOAP API classes. You will later be able to call these to issue commands through these APIs. Notice that the username, password, and hostname information passed into these classes comes from the variables declared immediately before the lines you pasted, retrieved from the environment variables using the Python getenv function. The strings passed into getenv directly map to the names defined in the .env file.
 which you should always see along the top of the window while Flask is running.
 followed by
 the green start/play button next to Start LTRCOL-2574 Portal
Any time you save a file that is used by your Flask app, you must restart it for the changes to take effect.
These are the APIs being exposed by the backend of your provisioning portal.
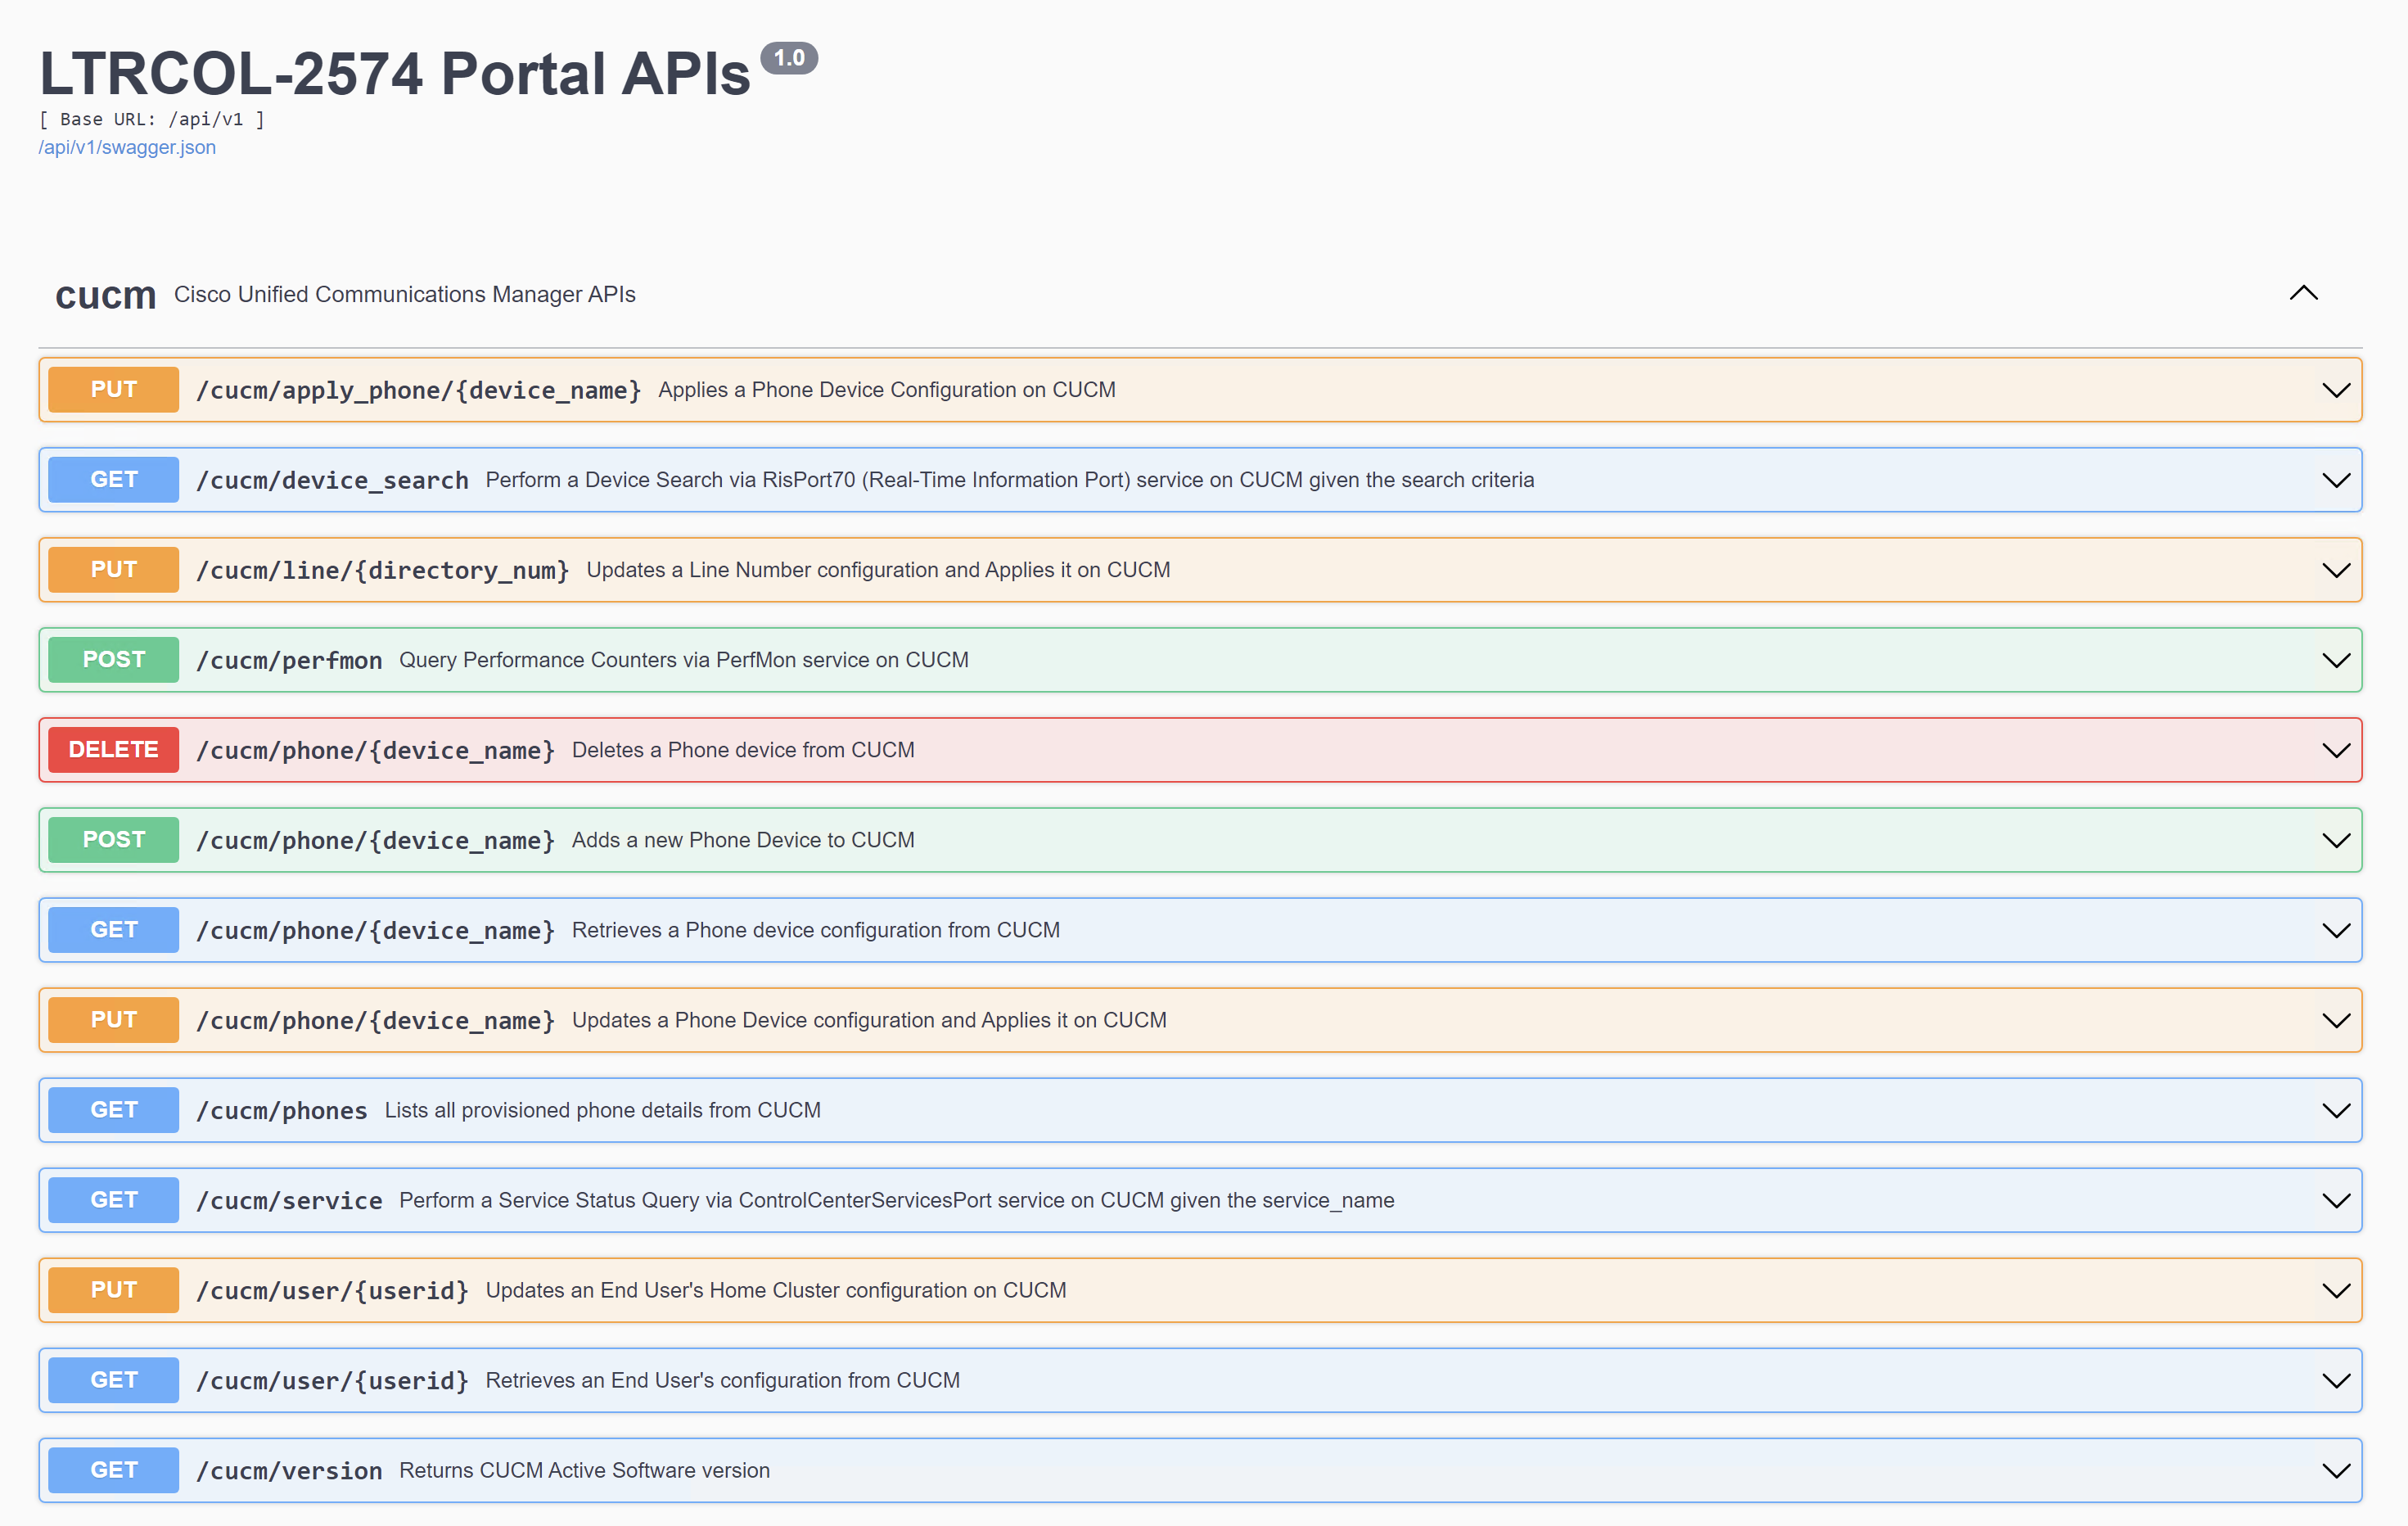
Each of the lines you see on this page is an API endpoint we have pre-configured for you. As mentioned previously, this page is generated automatically by SwaggerUI. To see where this all comes from, you can look at the flaskr/api/v1/__init__.py file. That file contains the following code:
from flaskr.api.v1.cucm import api as cucm
from flaskr.api.v1.cuc import api as cuc
from flaskr.api.v1.cms import api as cms
from flaskr.api.v1.wbxt import api as wbxt
from flaskr.api.v1.wbxc import api as wbxc
from flaskr.api.v1.core import api as core


v1_blueprint = Blueprint('api_v1', __name__,
                            template_folder='templates',
                            static_folder='static')

v1api = Api(v1_blueprint, title="Lab Portal APIs", version='1.0')

v1api.add_namespace(cucm)
v1api.add_namespace(cuc)
v1api.add_namespace(cms)
v1api.add_namespace(wbxt)
v1api.add_namespace(wbxc)
v1api.add_namespace(core)
The first part of the code with the import statements is importing the other Python files that are in the same directory as the __init__.py file. The content of those files is then added as a separate namespace to the API with the names provided. In this example, the cucm APIs are imported from the flaskr/api/v1/cucm.py file and added as a namespace to the API with the name cucm.
If you look at the flaskr/api/v1/cucm.py file, you will see lines like this example from the file:
@api.route("/line/")
    @api.param('directory_num', description='The Line Directory Number')
    class cucm_line_api(Resource):
        @api.expect(cucm_update_line_query_args, validate=True)
        def put(self, directory_num):
The first line that starts with @api.route defines a new API endpoint. Because it's in the cucm.py file which was imported as the cucm namespace of the API, this endpoint is prefixed with /api/v1/cucm/, so this line defines the endpoint named /api/v1/cucm/line/ followed by a parameter containing the directory number field as a string.
The line @api.expect(cucm_update_line_query_args, validate=True) tells the API what kinds of parameters to expect. In this case, it says to expect the parameters defined in cucm_update_line_query_args which is defined in the file flaskr/api/v1/parsers.py. If you look in that file you will see this definition:
# CUCM Update Line Query arguments
cucm_update_line_query_args = reqparse.RequestParser()
cucm_update_line_query_args.add_argument('callforwardtovm', type=inputs.boolean, required=False,
                                         help='Enable Call Forward to Voicemail', default=True, location='args')
You can see how this line indicates the name of the argument, the type (boolean), whether it's required or optional, the help text which is displayed in SwaggerUI, and the default value which is needed if the argument is optional.
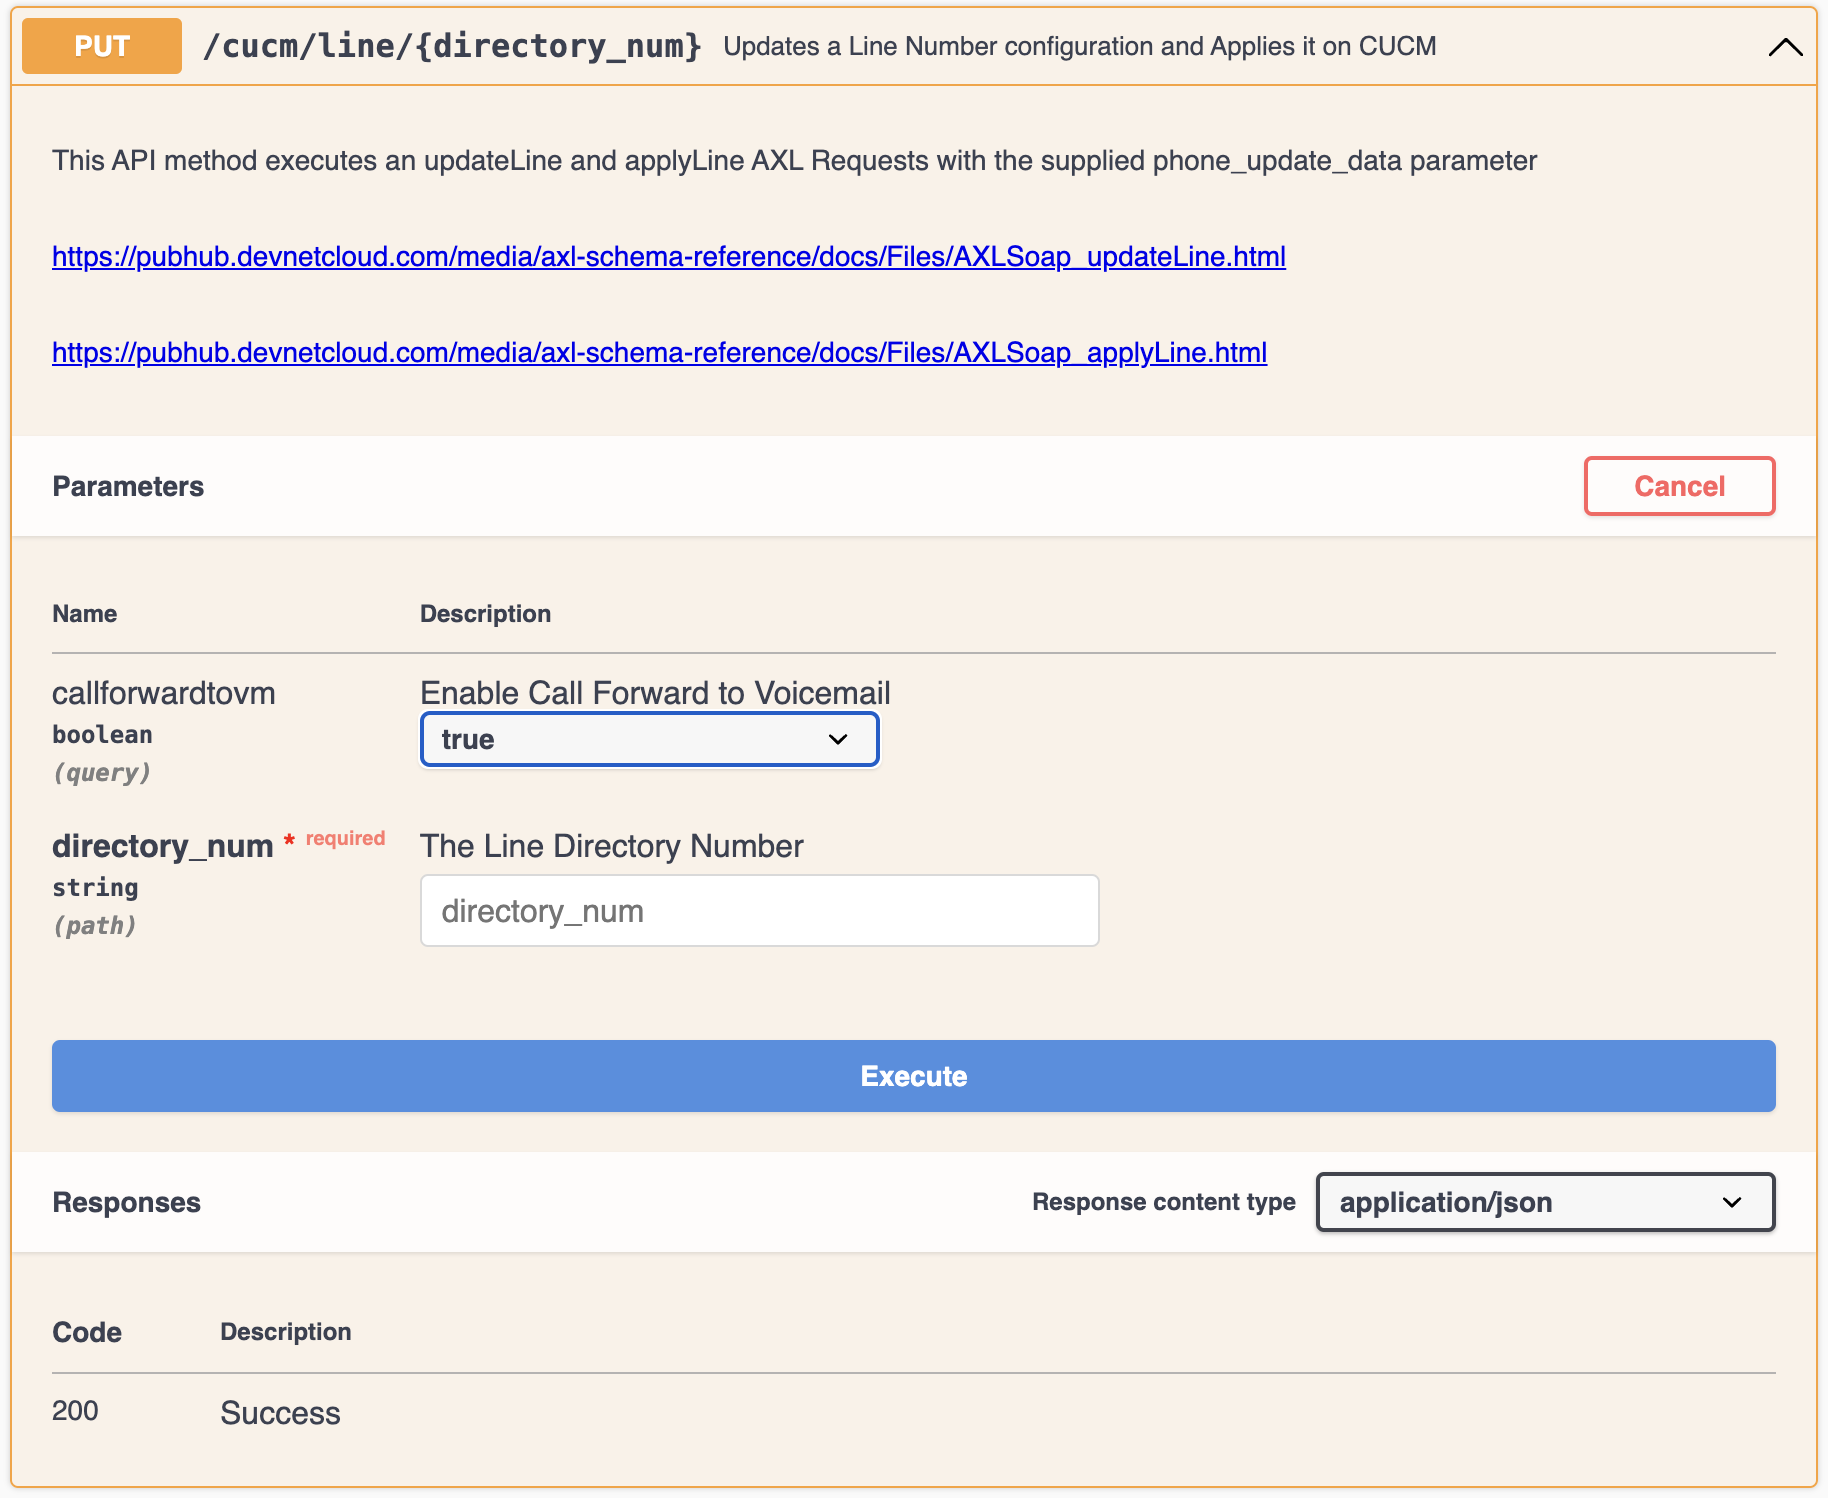
Finally, in the cucm.py example above you can see there is a function named put that tells the API that what follows is the code to execute if this API endpoint receives a request with the PUT verb. You will see this structure throughout the cucm.py file as well as the other files you will explore in the next few sections of this lab. These functions that define the portal / front-end API are all created for you which is why the SwaggerUI page is populated, but right now, most of the functions that define what the API actually does are empty. You will implement these functions in the next few sections.
If you click on the PUT /cucm/line/{directory_num} option on the Swagger UI page you will see this which is rendered from all the code you just explored above:
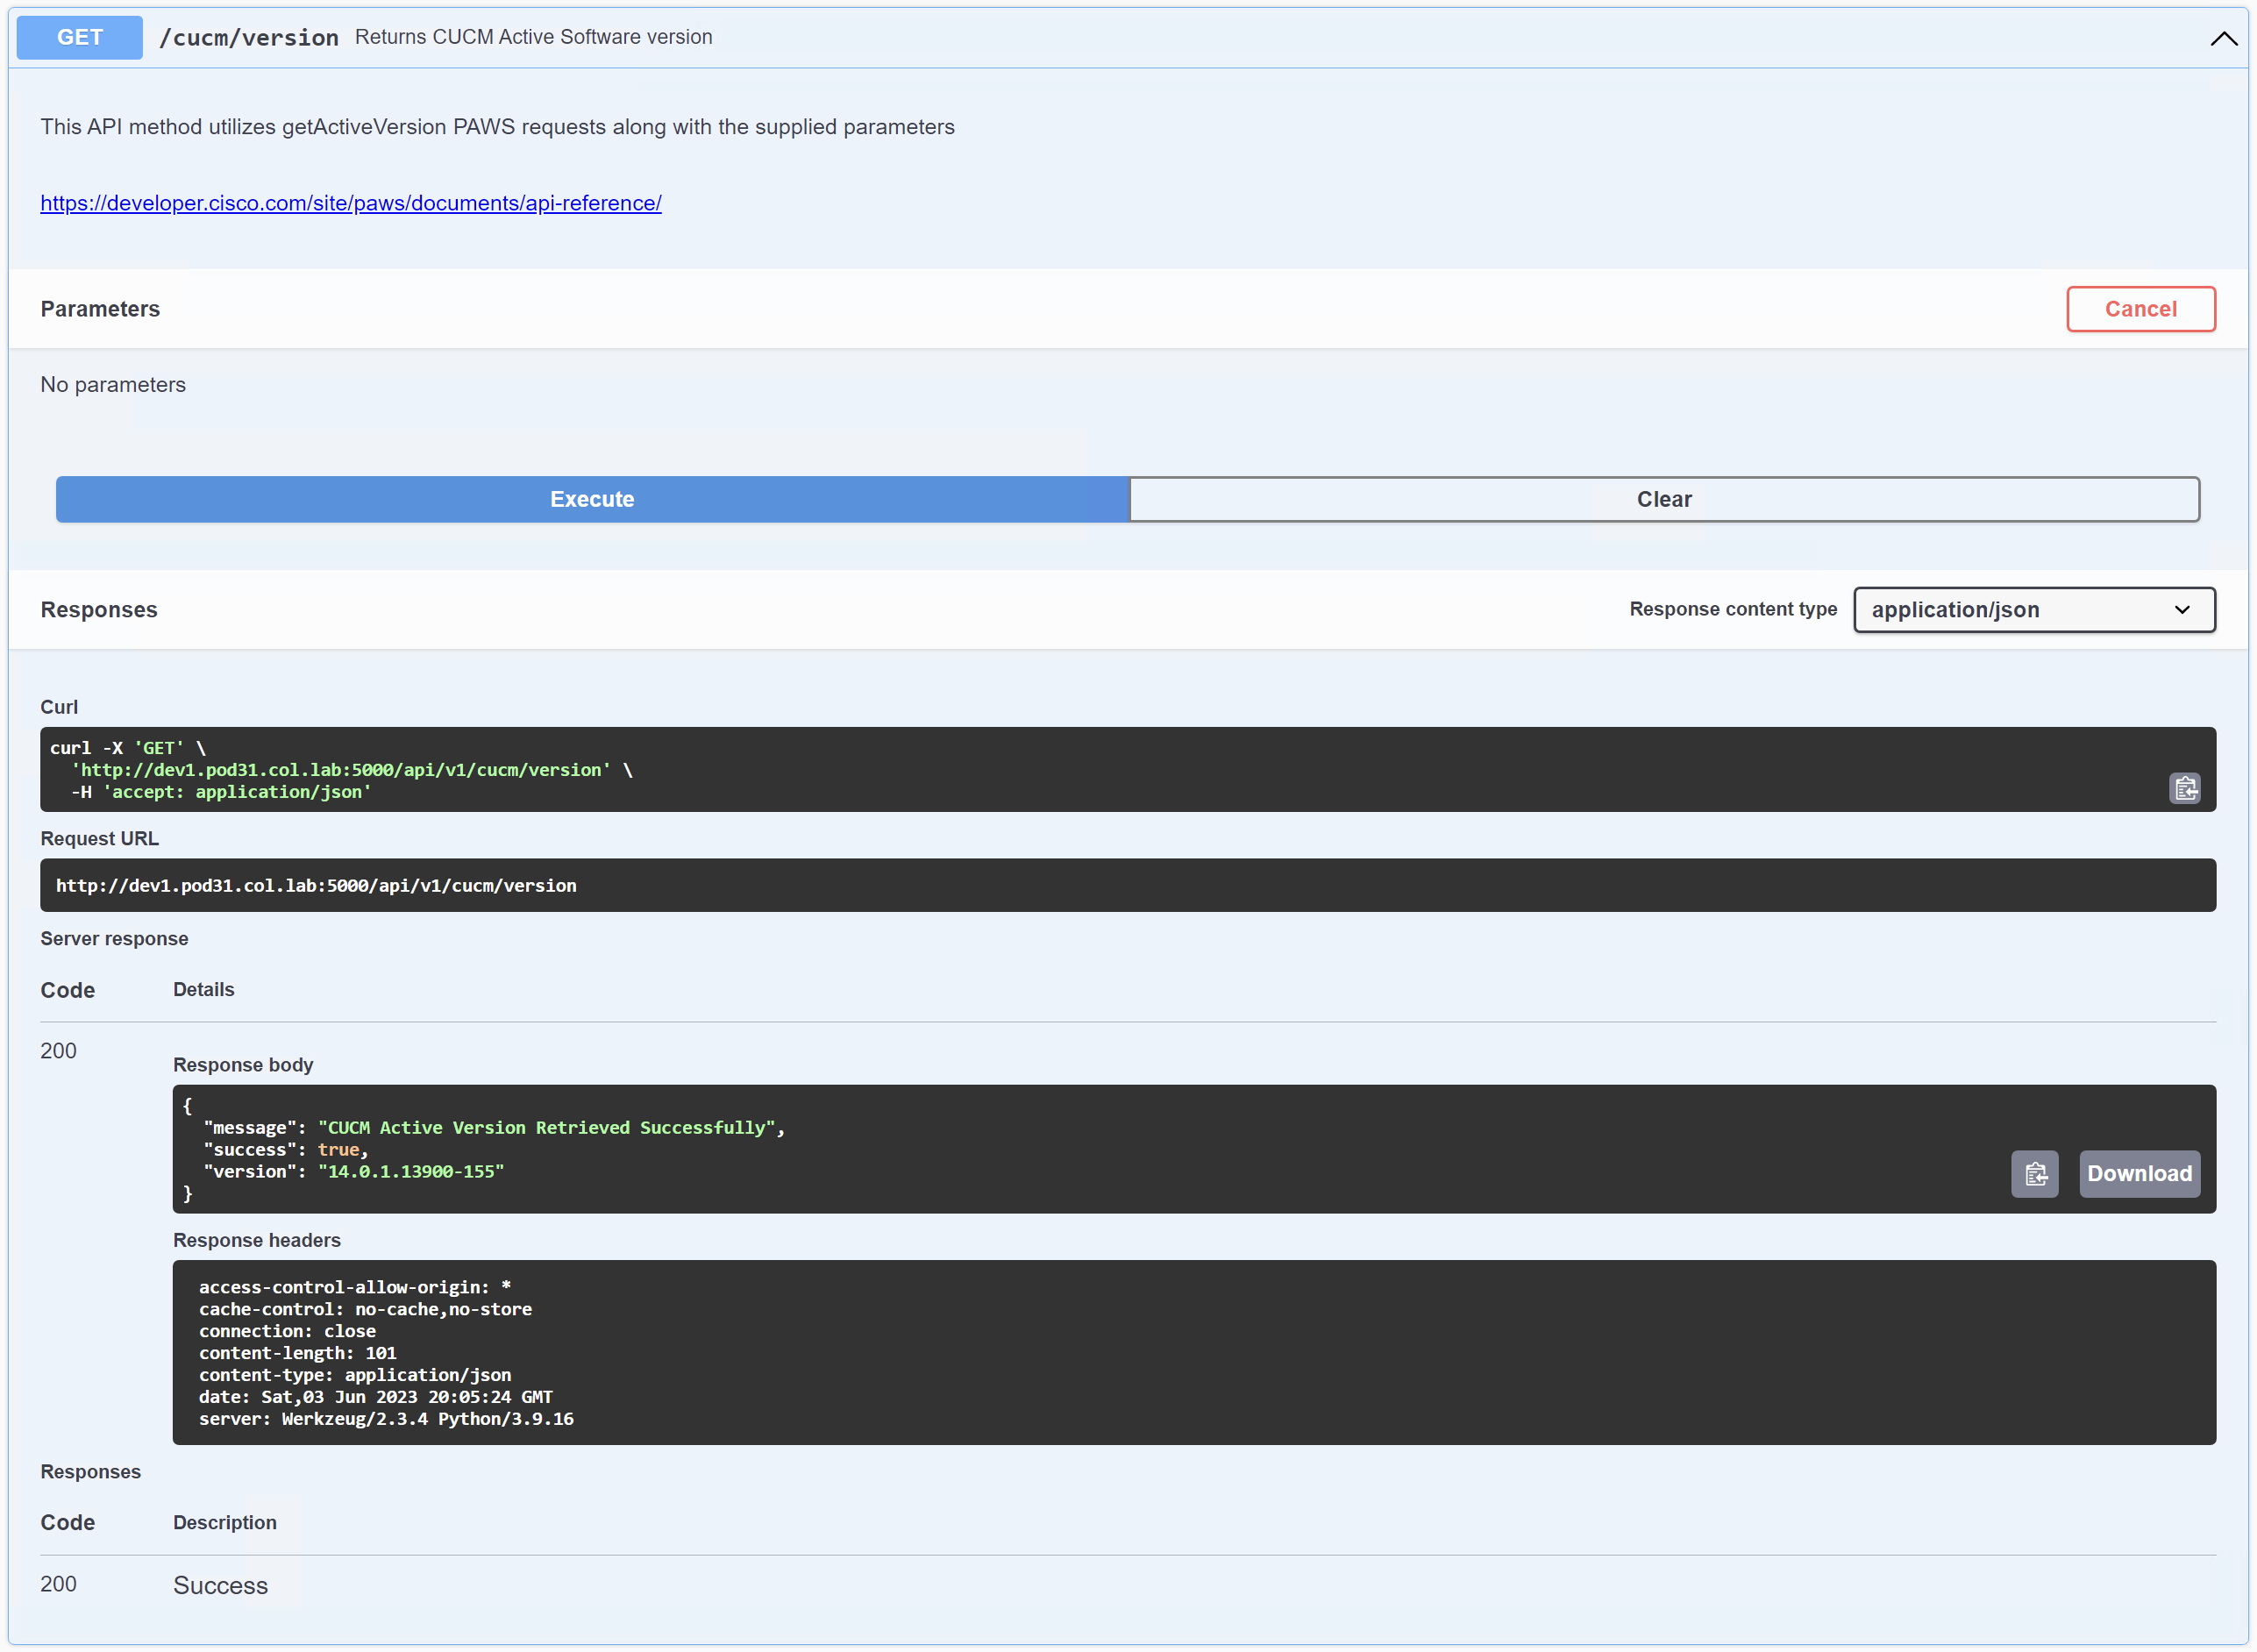
@api.route("/version")
class cucm_get_version_api(Resource):
    def get(self):
        """
        Returns CUCM Active Software version

        This API method utilizes getActiveVersion PAWS requests along with the supplied parameters


        https://developer.cisco.com/site/paws/documents/api-reference/
        """
        try:
            version_info = myPAWSVersionService.get_version()
        except Exception as e:
            result = {'success': False, 'message': str(e)}
            return jsonify(result)
        apiresult = {'success': True, 'message': "CUCM Active Version Retrieved Successfully", 'version': version_info['version']}
        return jsonify(apiresult)
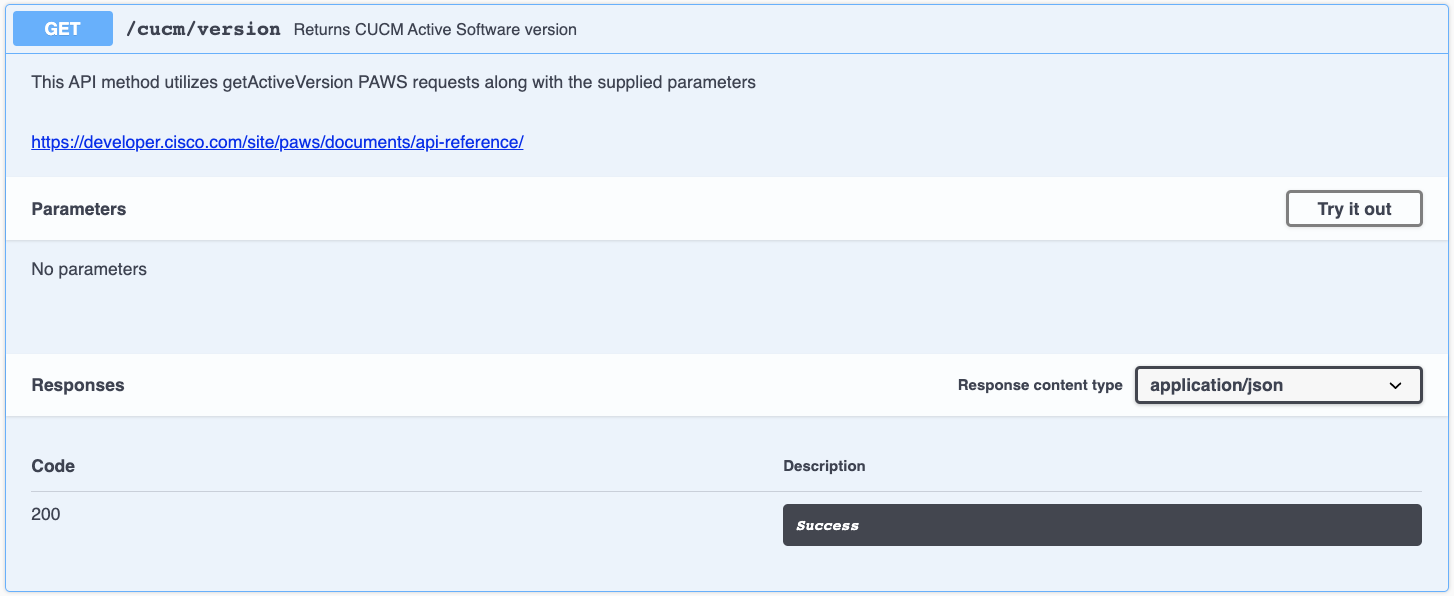
The first line, @api.route("/version"), automatically ensures that a function in this class is called when your web server receives a request on the "/version" URI depending on the verb that was used in the HTTP request. In this case you sent a GET, so the get(self) method is the one that gets called. The meat of what this method is doing is calling myPAWSVersionService.get_version() and parsing the output.
So what does myPAWSVersionService.get_version() do?
myPAWSVersionService is an instance of the PAWS class that you had instantiated at the beginning of this page. The PAWS class has a method called get_version that uses the PAWS API to pull the version information from CUCM. To explore what is happening in the PAWS class, you can see the following function in the flaskr/cucm/v1/cucm.py file:
@Decorators.paws_result_check
@Decorators.paws_setup
def get_version(self, Version='Active'):
    if (Version == 'Active'):
        return self.pawsclient.get_active_version()
    elif (Version == 'Inactive'):
        return self.pawsclient.get_inactive_version()
    else:
        raise Exception("get_version only accepts 'Active' or 'Inactive'")
By default, the function returns the Active version and calls self.pawsclient.get_active_version() to obtain the version. So now what does get_active_version() do? This function comes from the AxlToolkit that has the following method:
    def get_active_version(self):
        active_version = self.service.getActiveVersion()
        return active_version
The get_active_version() method calls self.service.getActiveVersion(). The getActiveVersion() method is one that was automatically generated by Zeep by reading the PAWS API WSDL file. It is this function that takes care of creating a SOAP request and sending it to the server, parsing the response, and returning back the version information from the server.
Finishing up by going back to the first class you looked at above - cucm_get_version_api:
    try:
        version_info = myPAWSVersionService.get_version()
    except Exception as e:
        result = {'success': False, 'message': str(e)}
        return jsonify(result)
    apiresult = {'success': True, 'message': "CUCM Active Version Retrieved Successfully", 'version': version_info['version']}
    return jsonify(apiresult)
The last operation to explain here is return jsonify(apiresult) line. You may have noticed why we are using jsonify instead of just returning the apiresult which is a dictionary. The reason is that the jsonify function is useful in Flask apps because it automatically sets the correct response headers and content type for JSON responses, and allows you to easily return JSON-formatted data.
Notice that at no point in any of this code did you need to worry about the actual SOAP request being made. There is no XML to write, no SOAP envelope to construct, no HTTP headers to set. All of that is handled by the Zeep library and the classes you have instantiated. You will find that the majority of the code you need to write is to handle the data that comes back from the the APIs and extract the information you need.
For the rest of this lab, you will be focused on these final pieces where you implement the actual work to make the API calls and parse the results. In this case, getting the version was relatively straightforward, but as you will see, more complex interactions will require more code.
You have just executed your first API call via your portal which called the CUCM PAWS API Version Service (getActiveVersion) request. The code to invoke this API was already provided, but you will be implementing several others on your own. Let's dive a little deeper and implement API functions that will provision your CUCM via the AXL API.