Besides the content you have already discovered in this lab, we have provided some additional sections that
let you explore some other tools to work with some of these APIs, as well as add extra functionality
to your portal.
Specifically, we will cover the APIs for Cisco Unity Connection and Cisco Meeting Server, each of which
have REST-based APIs that are fairly straightforward. For each case, he did not leverage an SDK, as
we did with the Webex APIs, but rather built a reusable REST layer for each of these APIs to use.
If you aren't interested in examining these APIs in detail, but rather want to just insert the code
to make the portal more functional, just go through each of the portal pages below, scroll to the
bottom, click the View completed File link, and then click Copy
copy the entire file contents into your portal's respective file.
The bonus section content falls into two categories: product-specific APIs and how to work with them using
tools such as Postman, and Python examples implementing portions of these APIs by way of the portal.
While the Webex APIs have a querying tool build directly into their documentations, the Unity Connection and
CMS APIs do not. Therefore, we will introduce a popular tool to accomplish the same tasks.
Step 1 - Postman
Postman is already installed on your student virtual machine. You will first build your own queries to understand the process
better, then use a Postman Collection, which is simply a pre-defined group of queries that can be organized and use
variables to avoid having to build every query from scratch.
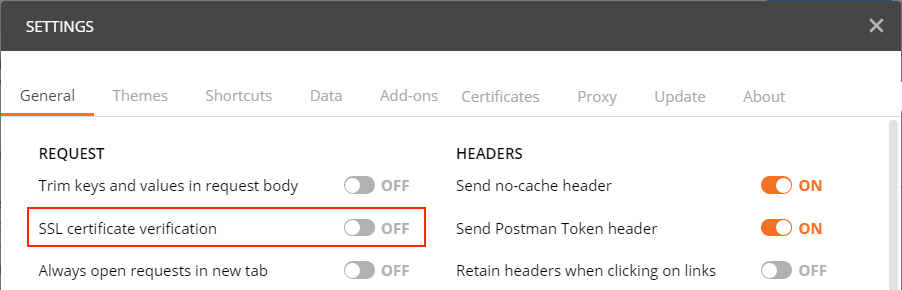
All REST APIs we will work with use the HTTPS protocol to ensure that the API requests are encrypted. In many cases,
the SSL certificates on the servers providing the REST API use self-signed certificates. As a result, clients like
Postman may generate an error because they cannot trust the server. In a production environment, you would want to
use proper CA-signed certificates so that this is not an issue. For this lab, you will have Postman simply
disable SSL certificate verification so that it will ignore untrusted certificates. Perform these steps:
From the Desktop of your Remote Desktop session, launch the Postman application.
You may notice a yellow bar indicating Working locally in Scratch Pad. This is normal.
Click File > Settings
On get General tab, make sure that the SSL certificate verification option to
make sure it is set to OFF (greyed out).
Click the X to close the Settings window.
Now you are ready to attempt your first request. For illustration purposes, you will send a request to a
Cisco Meeting Server (CMS) to query its system status.
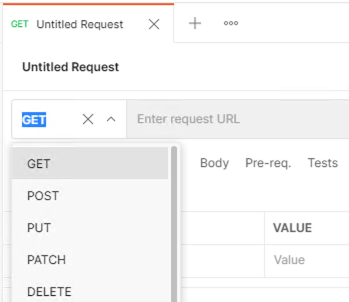
From the blank Postman UI, Find the + icon to create a new request.
Notice the default request type is GET. If you click on GET you will see
a list of verbs supported by Postman. For now, leave it set to GET.
To the right of GET, you should see a field that says Enter request URL.
This is where you will enter the URL to which you send the query. Enter the following URL into this field:
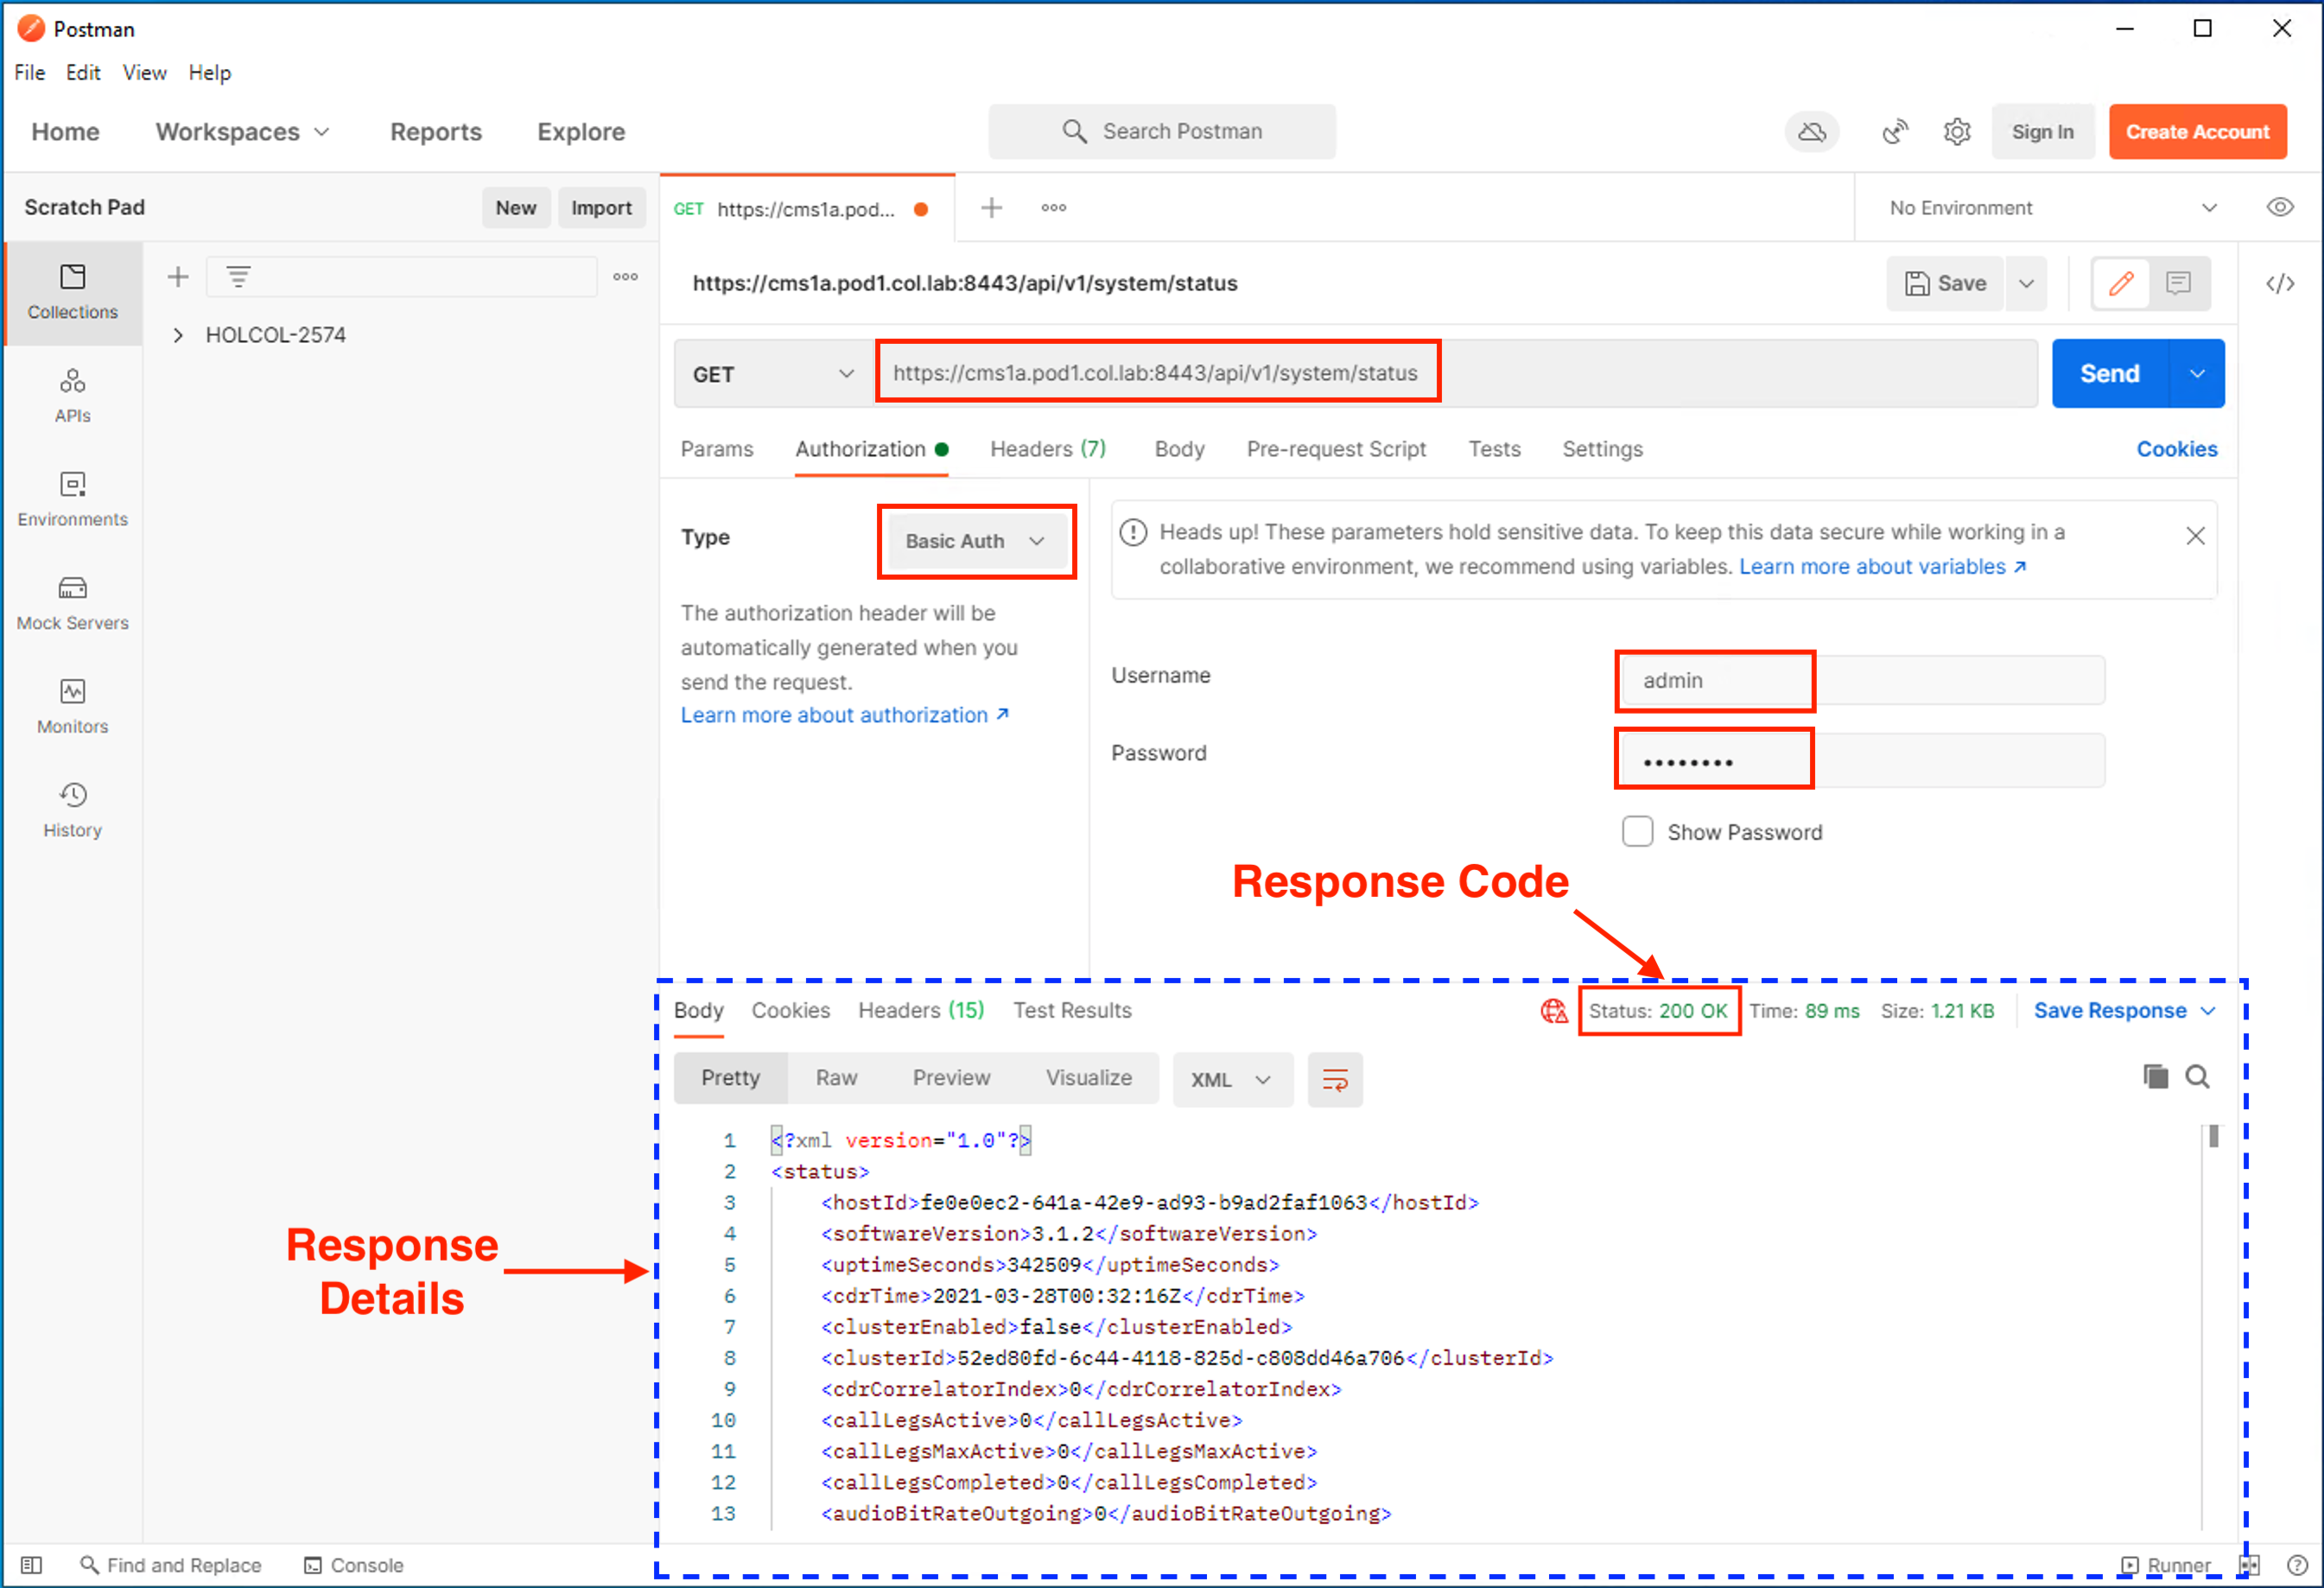
https://cms1a.pod6.col.lab:8443/api/v1/system/status
For most queries, authentication of some form is required. In this case, you will use basic username and
password authentication, so you need to configure these credentials in Postman to send with the
request. Below the GET button, there is an Authorization tab. Select it
now.
For the Type of authorization, select Basic Auth from the drop-down
After selecting Basic Auth, enter the
Username of
admin
and the Password
as
C1sco.123
Postman will add these credentials to the request as a Header item.
The Headers tab does not require any specific changes for this particular query,
because you are not sending a payload and the Postman tool is able to display anything this server can
send to us. Later on this will be one area of differentiation in the various REST services
you will explore.
Finally, click the blue Send button.
The response is now shown in the pane below at the right side. You will notice that there is
a Status message with a 200 OK. This is
extremely important to check each time
you send something, just to be sure the request was understood by the server, meaning there was no typo
or an invalid parameter used, or even an authentication failure. In general, anything in the 200-299
range is a success; whereas a 404 would indicate the URL destination was not found. A 401 is generally
an authentication error and a 503 indicates "server busy". Other 5XX responses usually
indicate some system problem, or something is malformed in the request.
The response payload or body is shown with the Body tab selected. By default it will
be in "Pretty" format, which simply adds spacing/indentation to the XML or JSON response, if possible.
In this case, the response is in XML, so the data is surrounded by keys, such as:
<softwareVersion>3.1.2</softwareVersion>
which is nested under <status>...</status>
Step 2 - Postman Collections
While you could create each query by hand like this, pasting the URLs and filling in header/content values, Postman has the
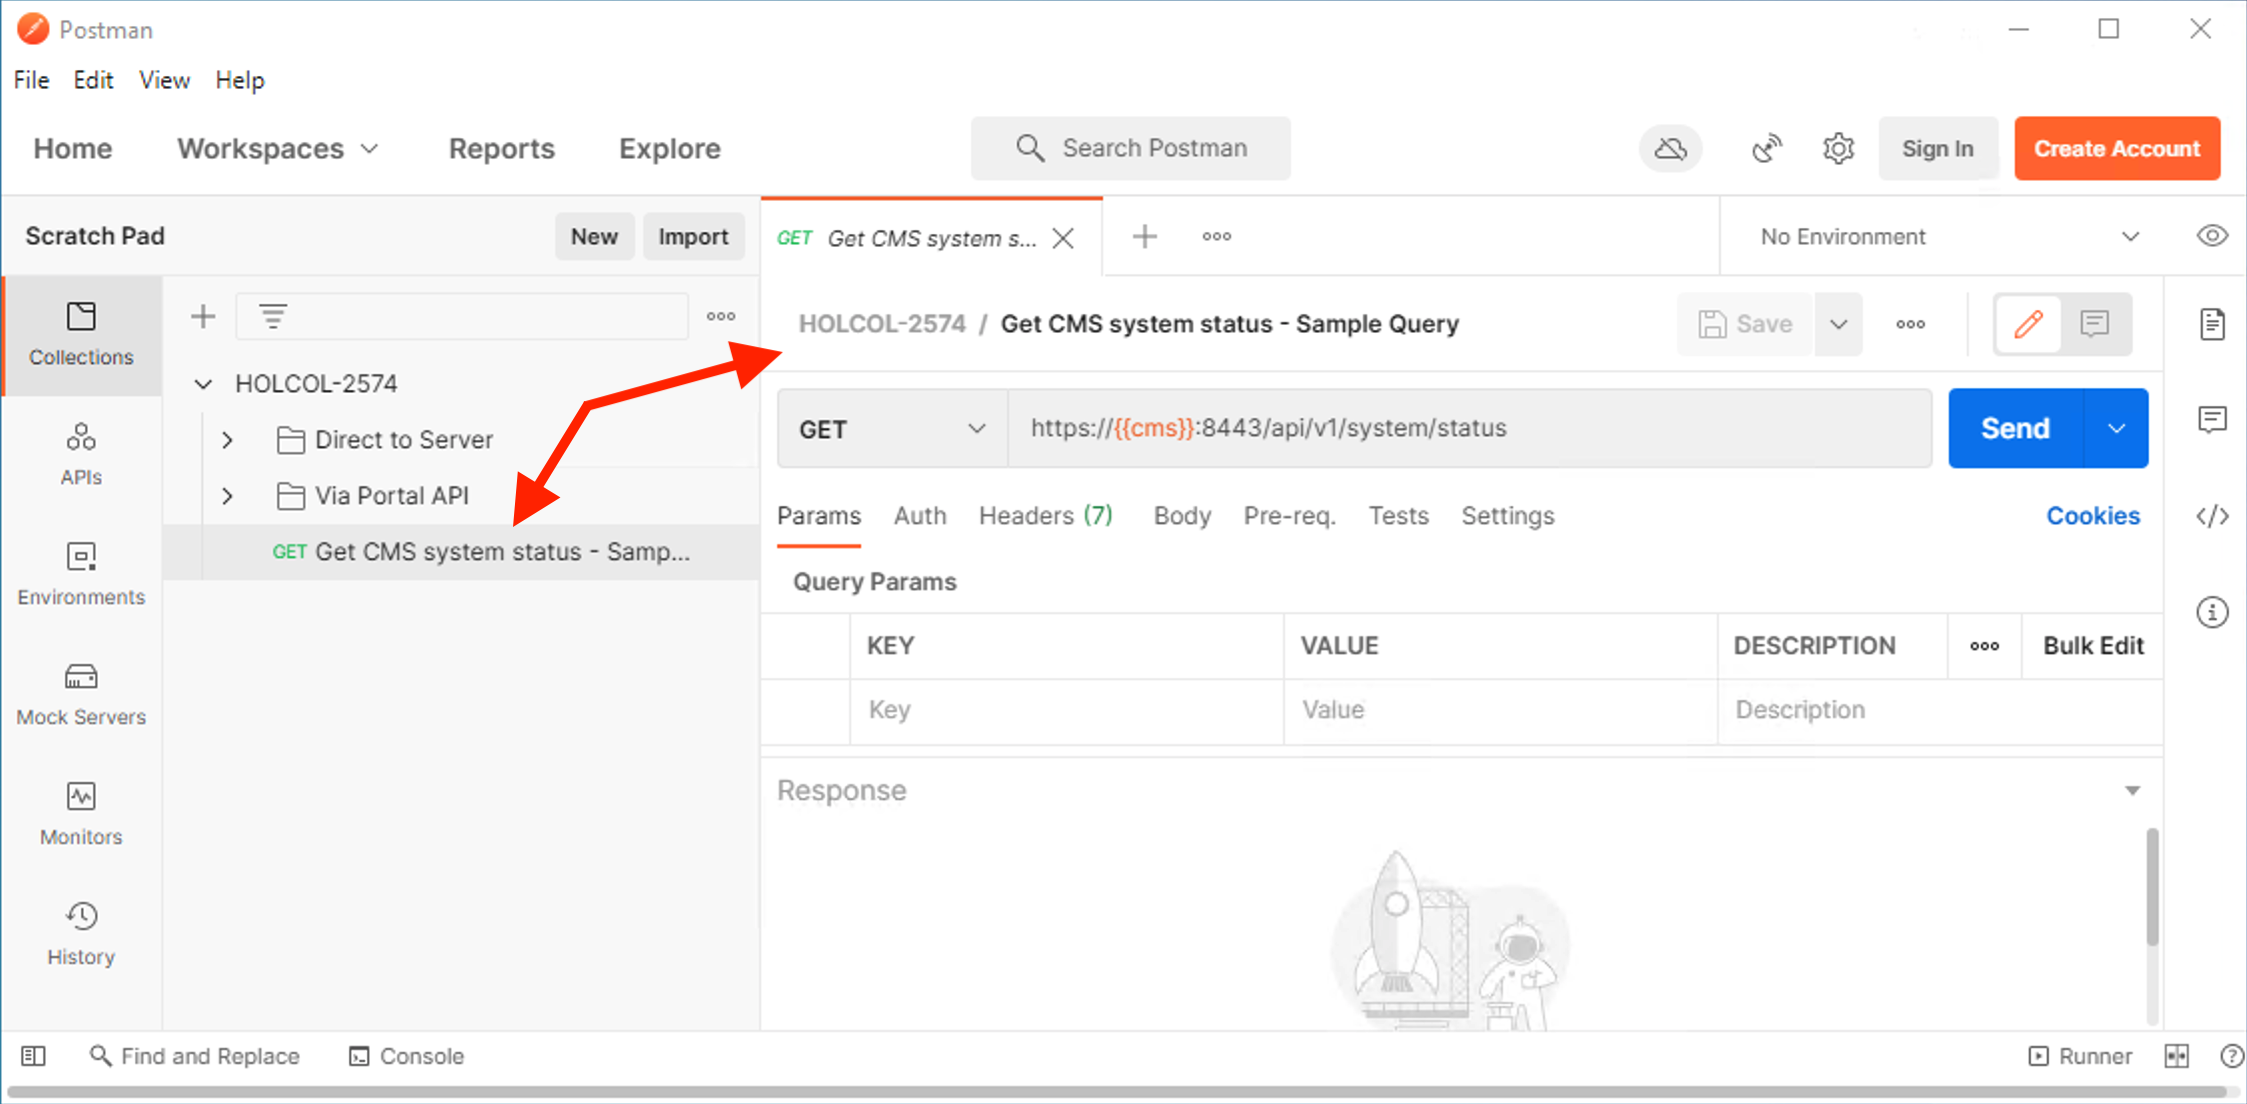
concept of a Collection, which are simply several preconfigured queries in a folder. You should already have a
Collection loaded into your Postman instance, called HOLCOL-2574. The Collection will have required
URLs, pod number and credentials pre-configured for all queries, so they don't need to be entered each time. Follow these
steps to explore your Postman Collection.
In Postman, make sure at the left side of the screen, the side-bar is visible (otherwise select
View > Toggle Sidebar).
On that side-bar, make sure the Collections tab is selected.
Expand the HOLCOL-2574 collection. You should see two folders, Direct to Server
and Via Portal API, as well as a GET request at the bottom.
Click on the GET CMS system status - Sample Query item. The sample query should
open as a new tab.
You will notice all settings are already filled in. The Collection has some variables defined, such as the
{{cms}} variable, so when you see that in the URL, be assured that
your CMS hostname will be substituted in its place. Click Send
and you'll observe the same results as before. (If needed, the View > Show Postman
Console can show the raw request/response for additional detail)
In the next section you will explore a RESTful API in depth: the Cisco Unity Provisioning Interface API.