Cisco Meeting Server (CMS) has a rich REST-based API that allows configuration of nearly all settings, many of which can only be configured via the API, especially when working with clustered CMS systems. Any CMS server can have the WebAdmin service enabled, which also enabled the administrative GUI page. A separate account may be used for API access, or an admin account can be used.
The Cisco Meeting Server API documentation can be found here: https://www.cisco.com/c/en/us/support/conferencing/meeting-server/products-programming-reference-guides-list.html
CMS supports the regular GET, POST, PUT, and DELETE verbs to retrieve, create, modify, and delete an object. All of the requests will be sent to /api/v1. Responses could include 503, to indicate a busy condition, a 404, if the destination is not found, or other 4XX and 5XX response codes, which will are documented in an XML-encoded reply to the message body.
There are a few features to note:
To illustrate Meeting Server capabilities, you will configure the following using Postman:
You already retrieved the system status of CMS in the REST overview section. You will repeat this using a Postman Collection just to make sure everything is set up.
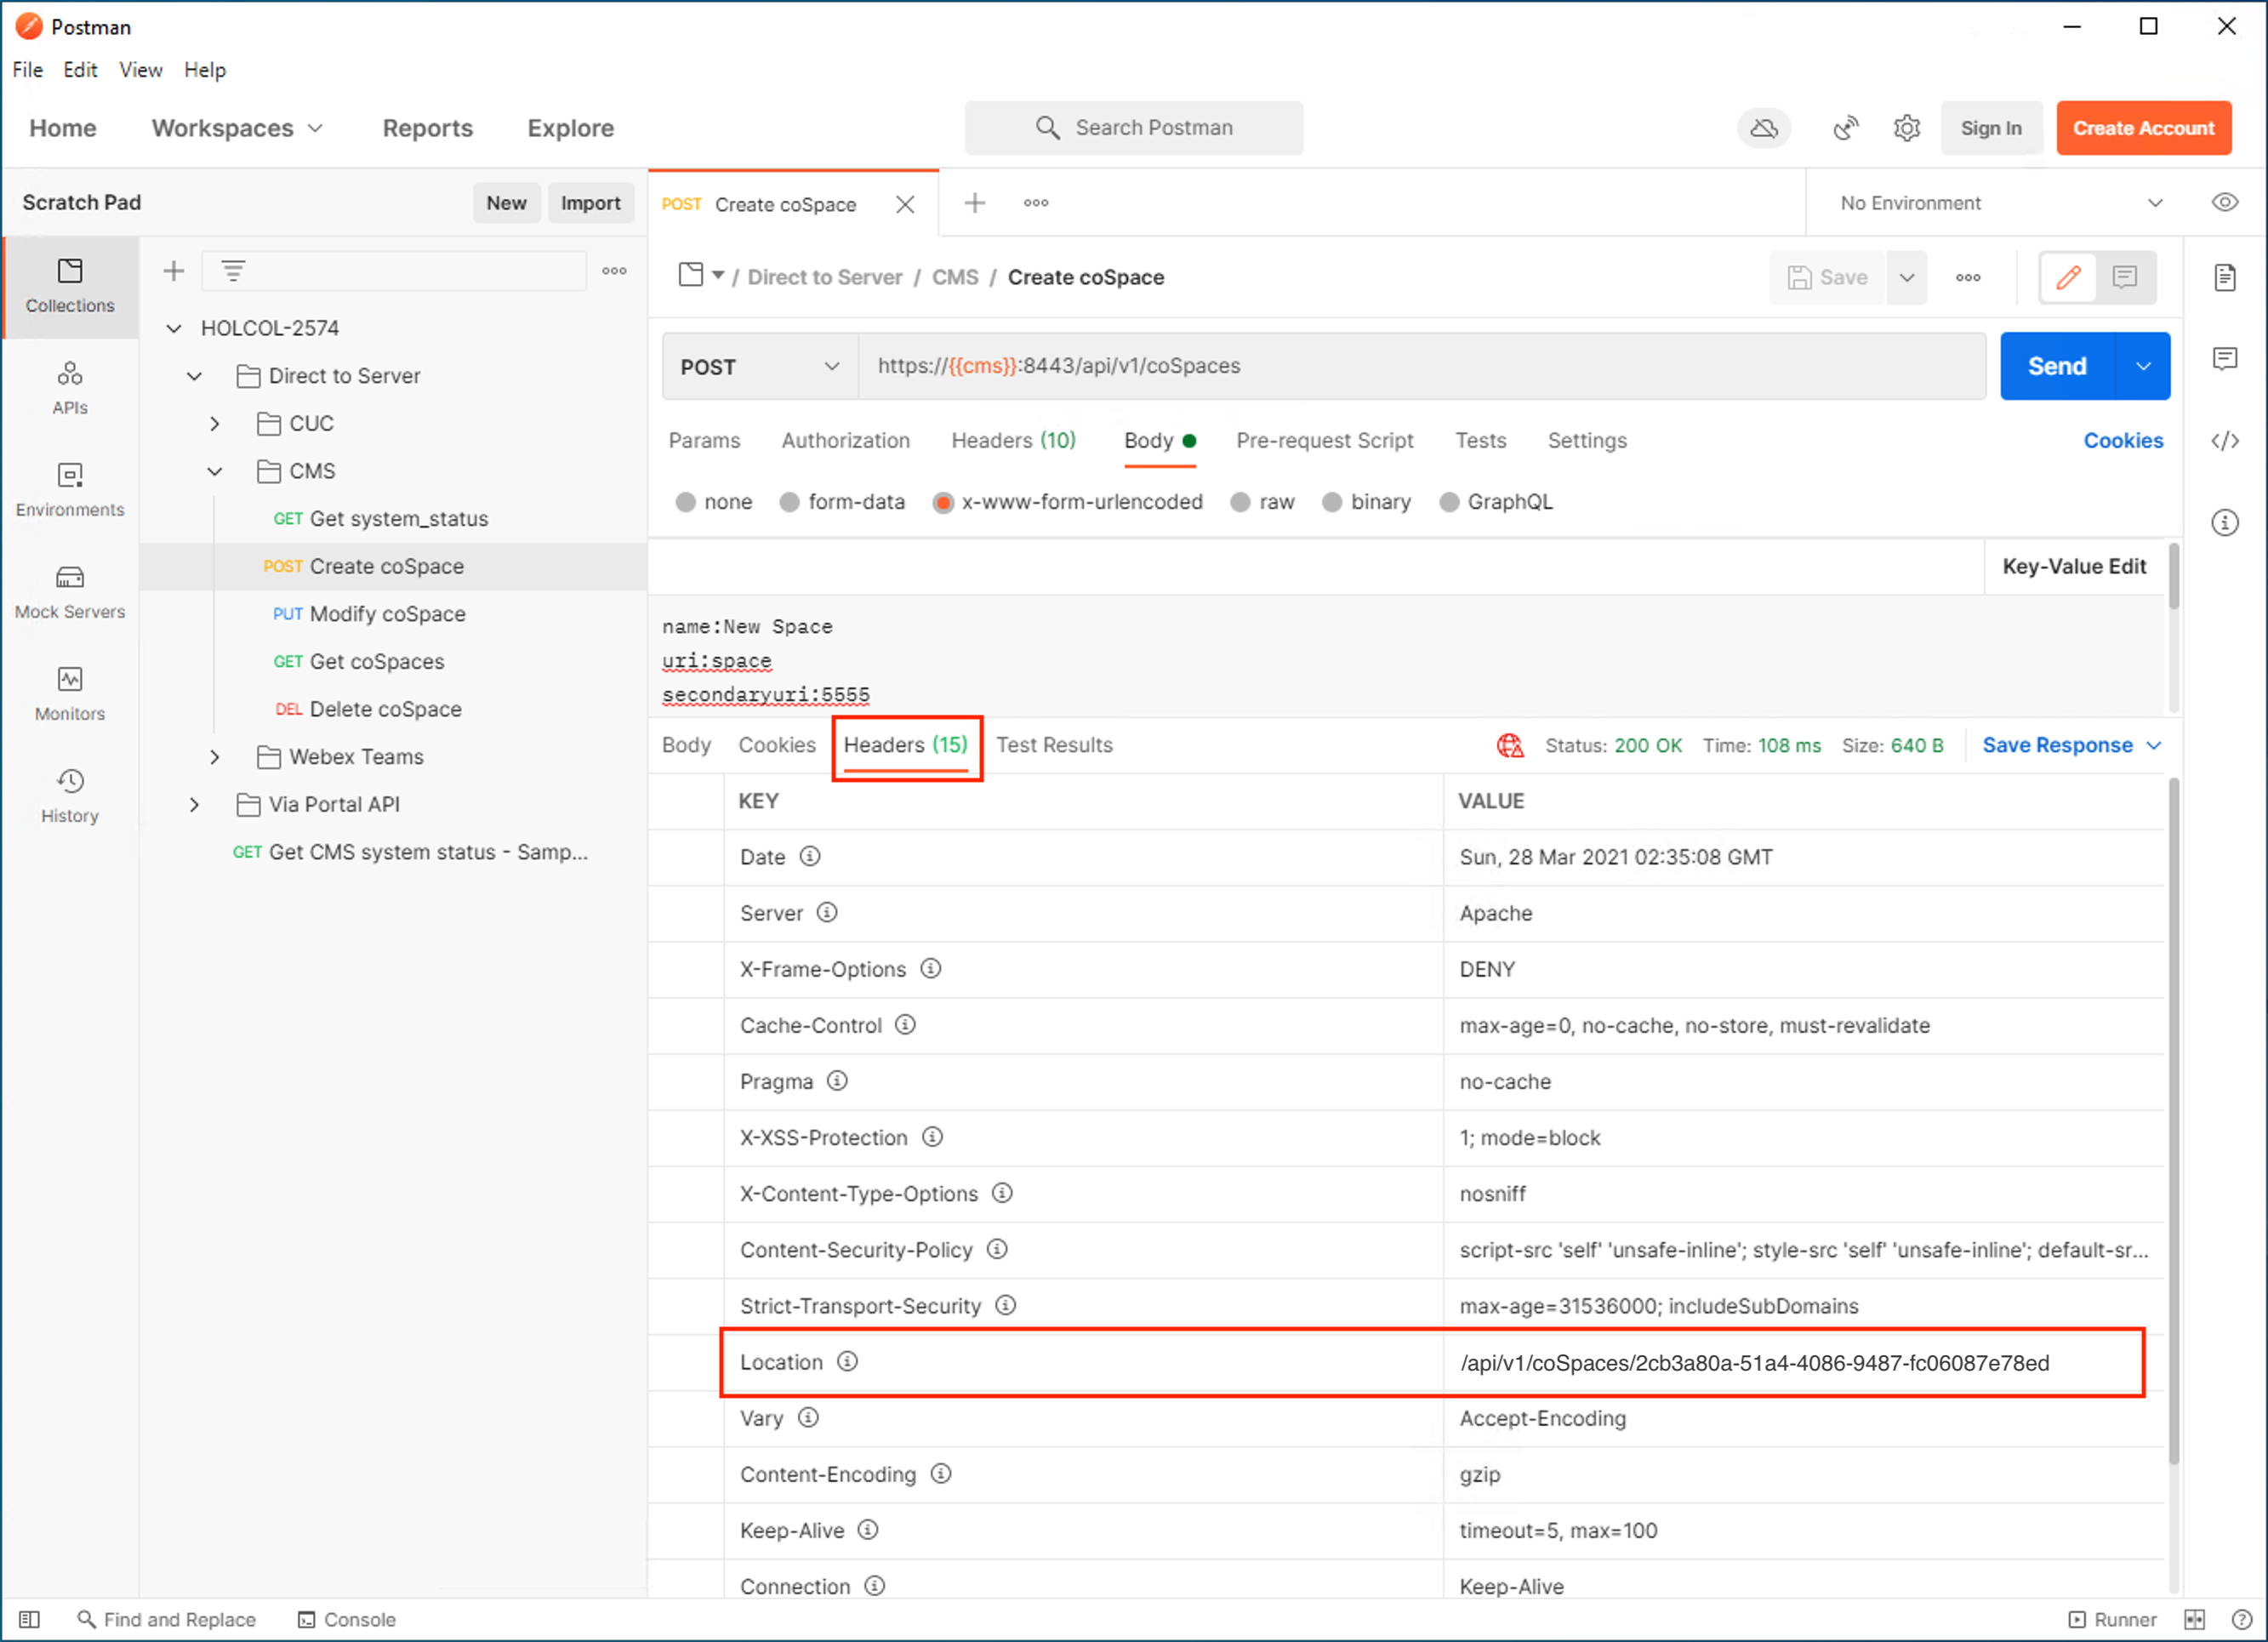
Creating a Space in CMS is fairly straightforward. A POST request is sent to /api/v1/coSpaces. Note that in the CMS API, Spaces are always called coSpaces, deriving the name from its origins with Acano. In the Header of the request, the Content-type must be specified as application/x-www-form-urlencoded. This will pass the information you enter in the Body section as part of the URL in the correct format. In this case, all of the key/value pairs will be encoded something like this to the URL itself:
name=New%20Space&callId=5555&secondaryuri=5555&uri=space
So technically these are URL parameters instead of a payload as we have seen with JSON previously. But
having the correct Content-type specified is significant. If the server does or does not expect a particular
Content-type may determine the success of the query.
As you can already see, even though both Unity Connection's CUPI and the CMS API are both REST-based, they have
some significant differences in how the informtion is passed to them.
name:New Space
uri:space
secondaryuri:5555
/api/v1/coSpaces/2cb3a80a-51a4-4086-9487-fc06087e78ed
Copy this object id (the coSpaceID) value from your Location header,
since you will need to use it in the next step.
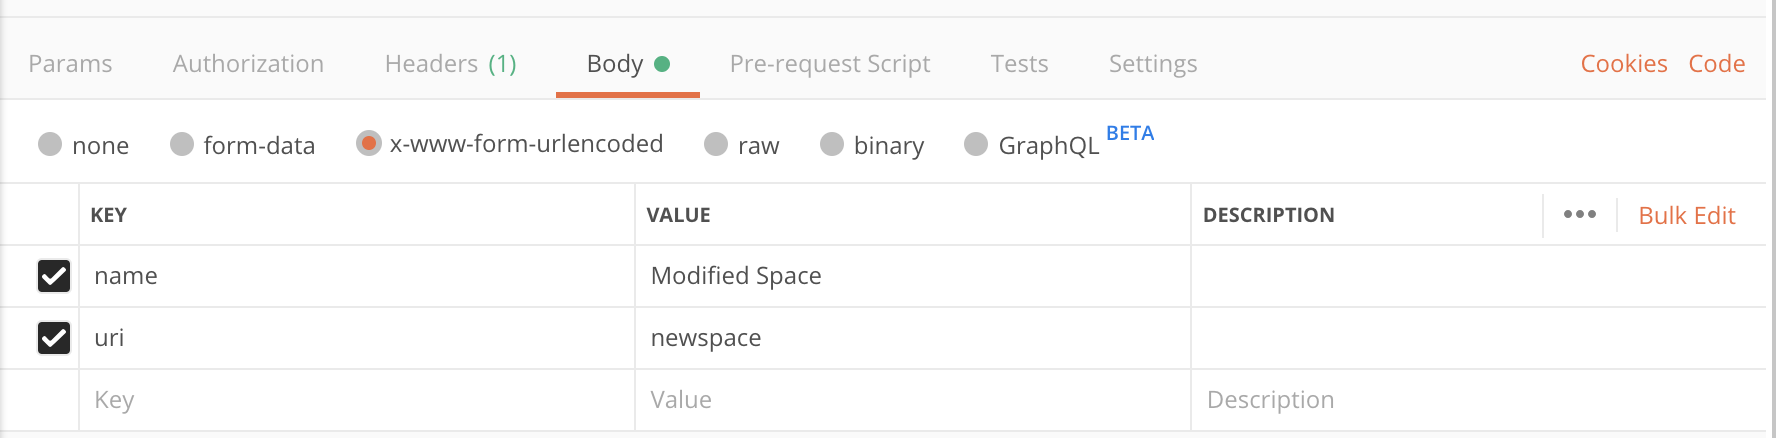
Modifying the Space is similar as creating the Space, since you are sending data (with the desired changes), however that the Space ID will now be part of the URL.
Retrieving the list of all Spaces is simply of sending a GET request to /api/v1/coSpaces.
You'll notice that this request was not very specific, in that it always retrieves the entire list of coSpaces unless
a filter parameter is specified, for example, https://cms1a.pod6.col.lab:8443/api/v1/coSpaces?filter=pod
The problem that you will need to solve later, is that the filter above, pod is searching coSpace names, URIs,
and secondaryURIs for *pod*. So if the filter only contains a single letter, it is almost the same as
getting the entire list. There is no way of specifying a specific user, without using that user's object ID.
A second consideration is that CMS can limit the number of items it returns. Currently the documentation states that the internal limit is 10, meaning if you have a 100-Space system and you send a request to GET /api/v1/coSpaces to retrieve them all, you will receive only 10 coSpaces in the reply, however, the total= value (see the reply above) will indicate the total number of matches (not the number returned). Using this total and the offset parameter, will allow us to get a "page" at a time, if you need to get a larger list of coSpaces. For example, if a GET /api/v1/coSpaces (with offset 0 implied) will return, say, the first 10; a GET /api/v1/coSpaces?offset=10 will retrieve from 11-20, etc.
Do not assume the number returned will be limited to 10. This number may change and has been observed in certain versions to have changed. The point is simply not to assume that if you are requesting all records, that all will be returned at a time.
Deleting a Space simply requires the coSpace ID, which you have from the previous query.
Now you are ready to look at notifications using Webex.