You have seen how a request to Cisco Webex can be performed using Python and have retrieved an administrative
access token via a Service App. Now you can gain more experience by
implementing a more substantial business task, such as enabling a user for Webex Calling.
Minimally, this involves looking up a user, as you have already done,
then updating them with a location, license,
and phone number associated with Webex Calling. This will be accomplished by performing the following tasks:
Look up Licenses
Look up a Location
Update a Person
Verify User is Enabled for Webex Calling
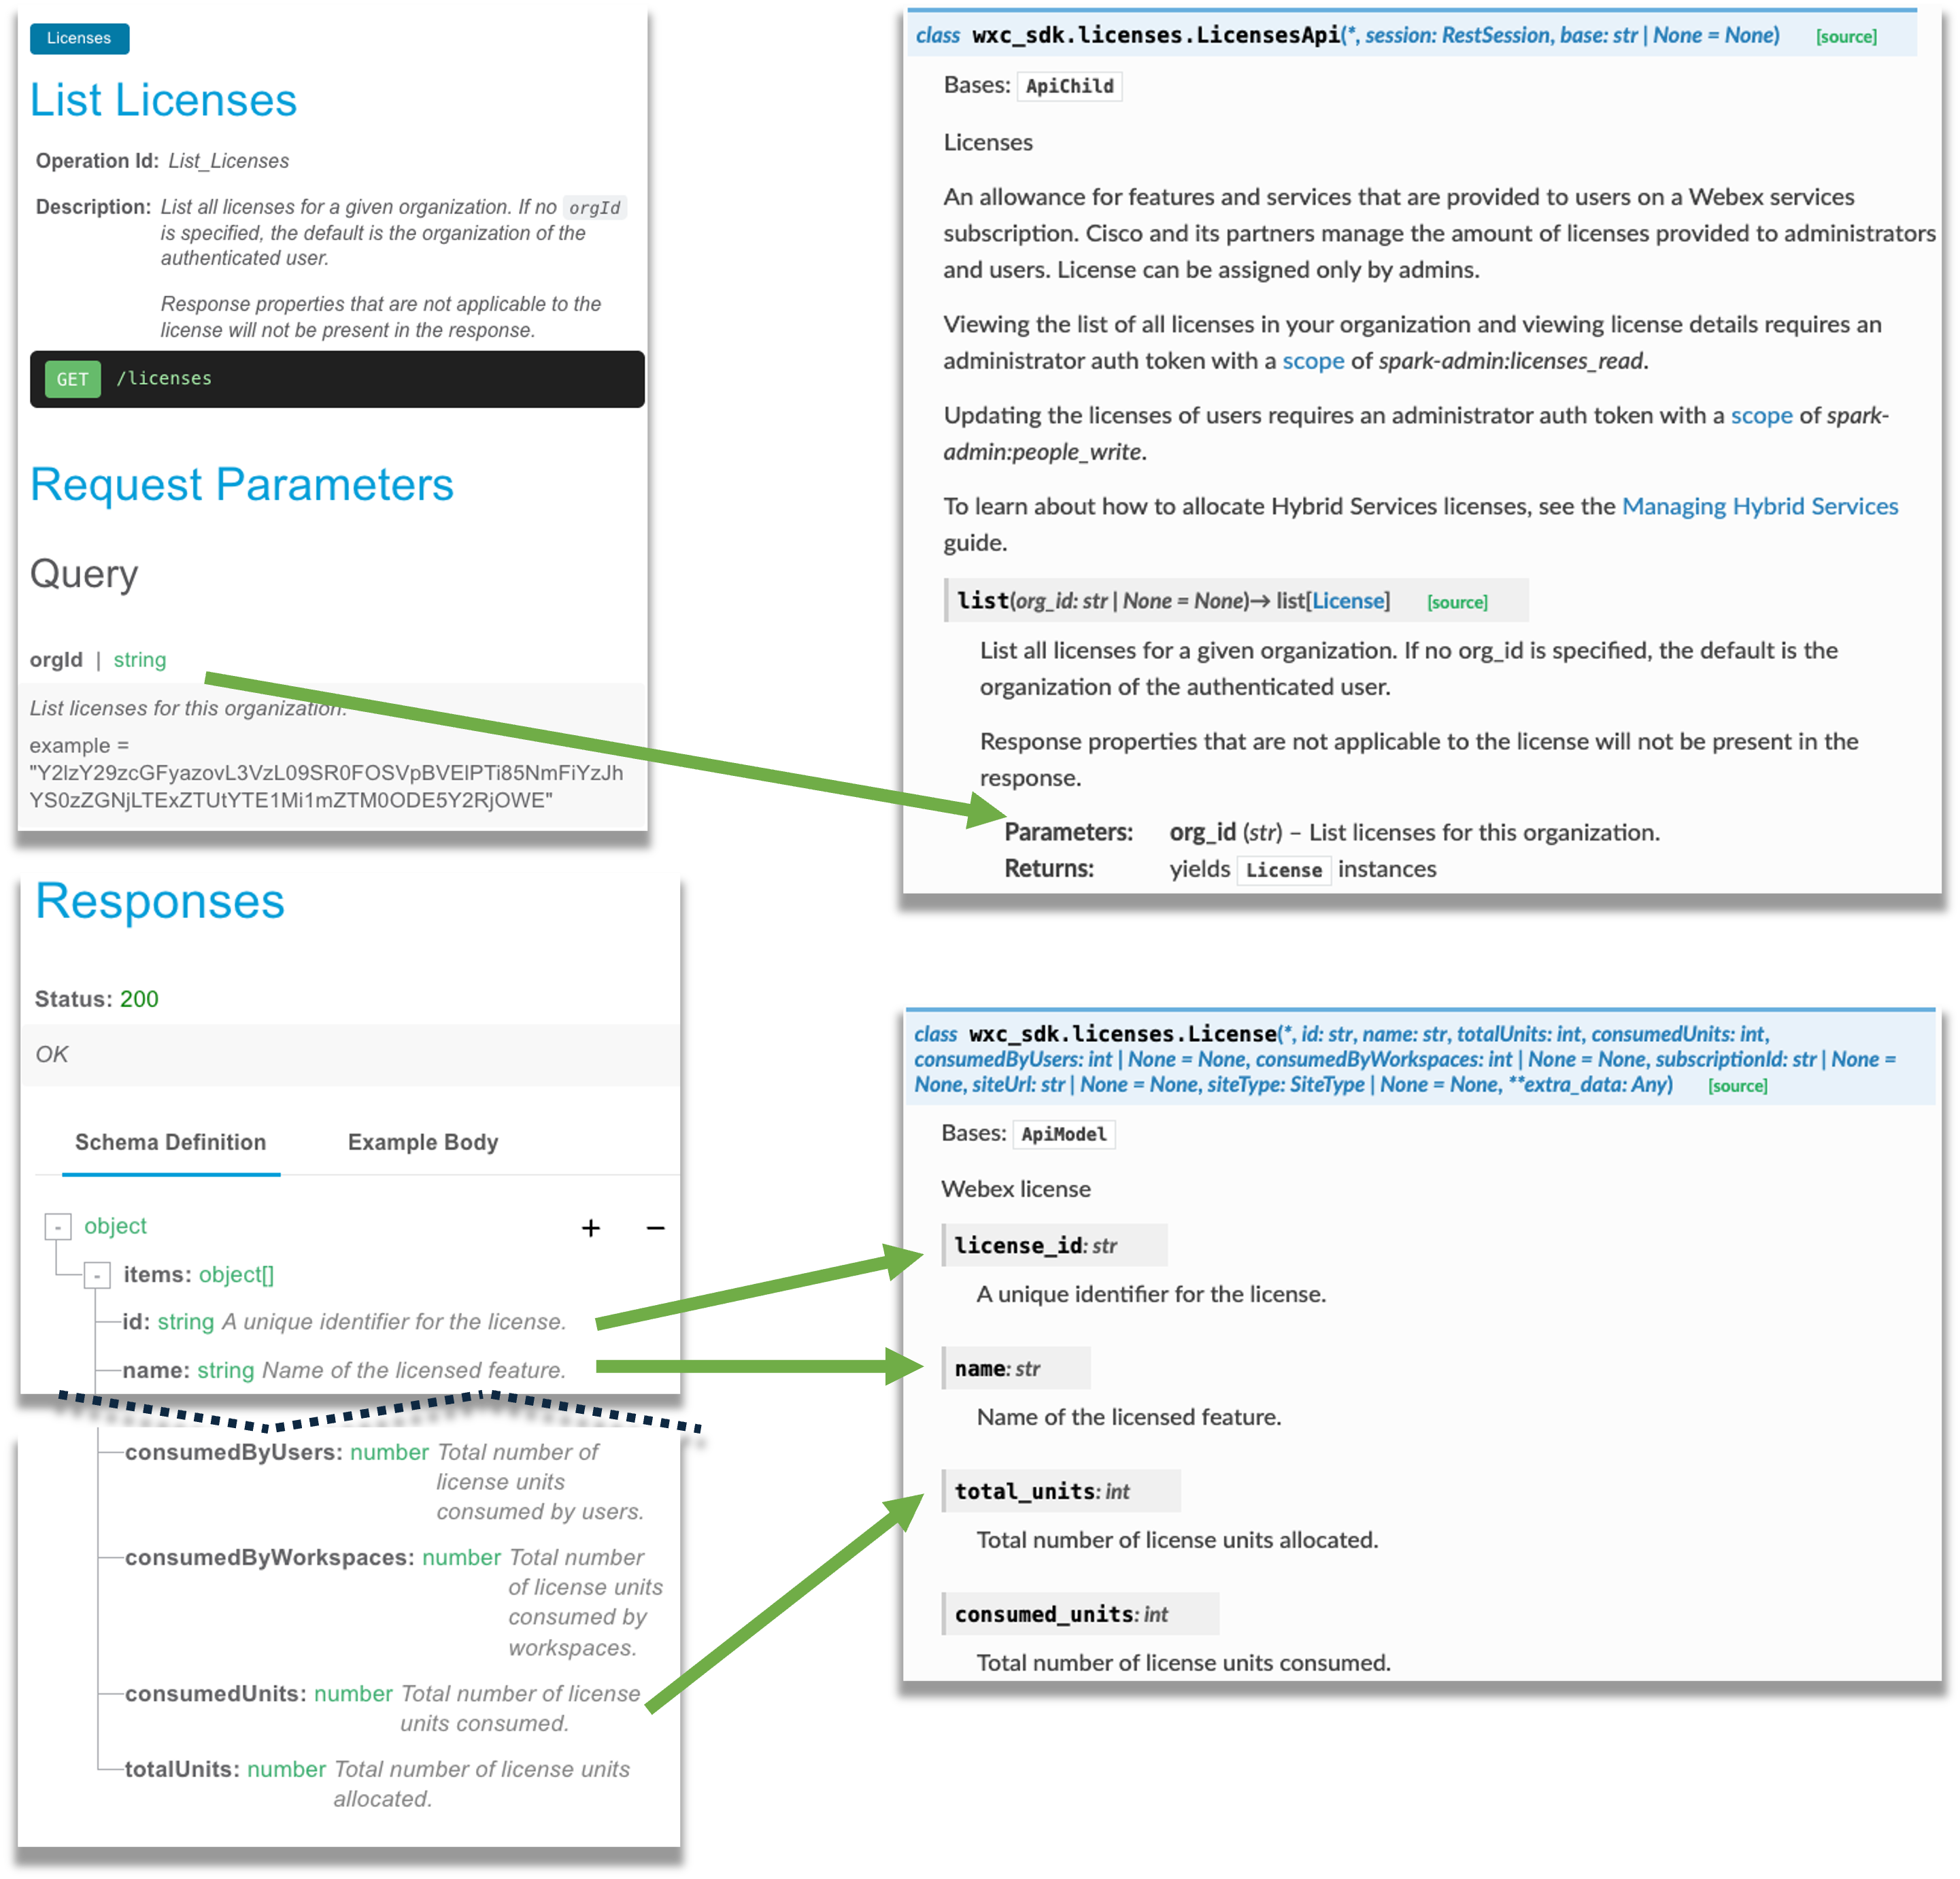
Step 1 - Look up Licenses
To query for the licenses in your Webex organization, you need to use the List License API. The
wxc_sdk has a LicenseAPI submodule so this is similar to looking up a user which you have already done using a similar list()
method.
Access your VS Code instance: https://dev1.pod6.col.lab:8443 and open
wxc_enable_user.py in the examples directory. You have already completed the
work in half of this file, so now that you have a token with the necessary scopes, you can proceed with the next steps.
The org_id parameter is not mandatory, so you can just call the method,
api.licenses.list() and save it to a list variable. Like before, you can iterate through
the list and print out the license name and id. Unlike the previous "list" operation you performed to
list users, this query will return multiple results. Note that the
attributes in the SDK are "name" and "license_id". In this case, you will want to save both the license
for "Webex Calling - Professional" and "Unified Communication Manager (UCM)" because those will be used later. If found,
you can display the license name and ID to indicate that it was found.
Copy and Paste the following code in to your wxc_enable_user.py file :
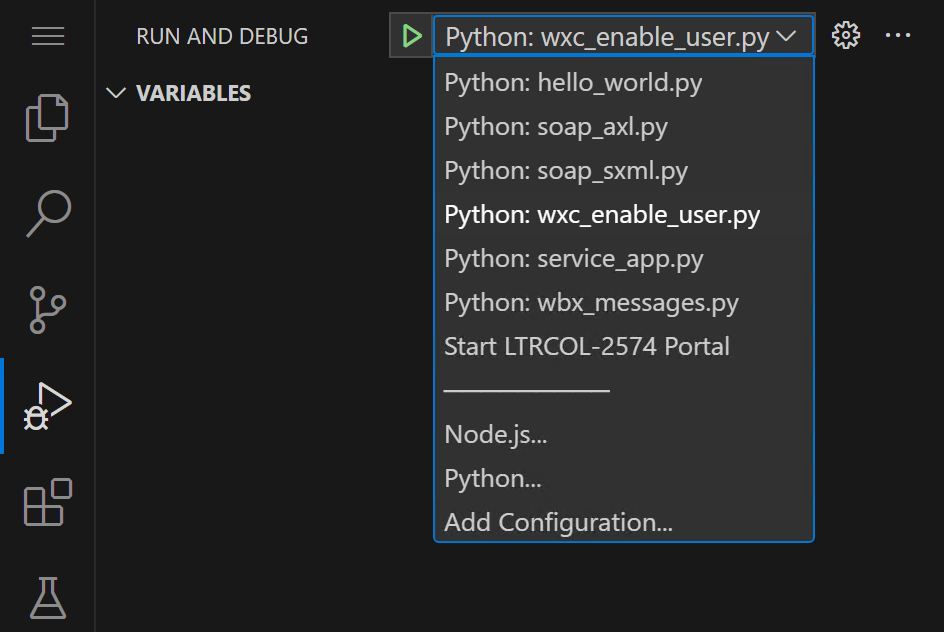
Make sure the predefined configuration for running this script, called
Python: wxc_enable_user.py is selected:
Click Start Debugging and examine the Terminal window output.
You see the license name and ID logged, because it was found.
=
If you receive a 403 Client Error, this indicates that the access_token variable
is the file was not replaced with the access token created by the service app in the previous section.
Please ensure that the previous' section's steps were completed.
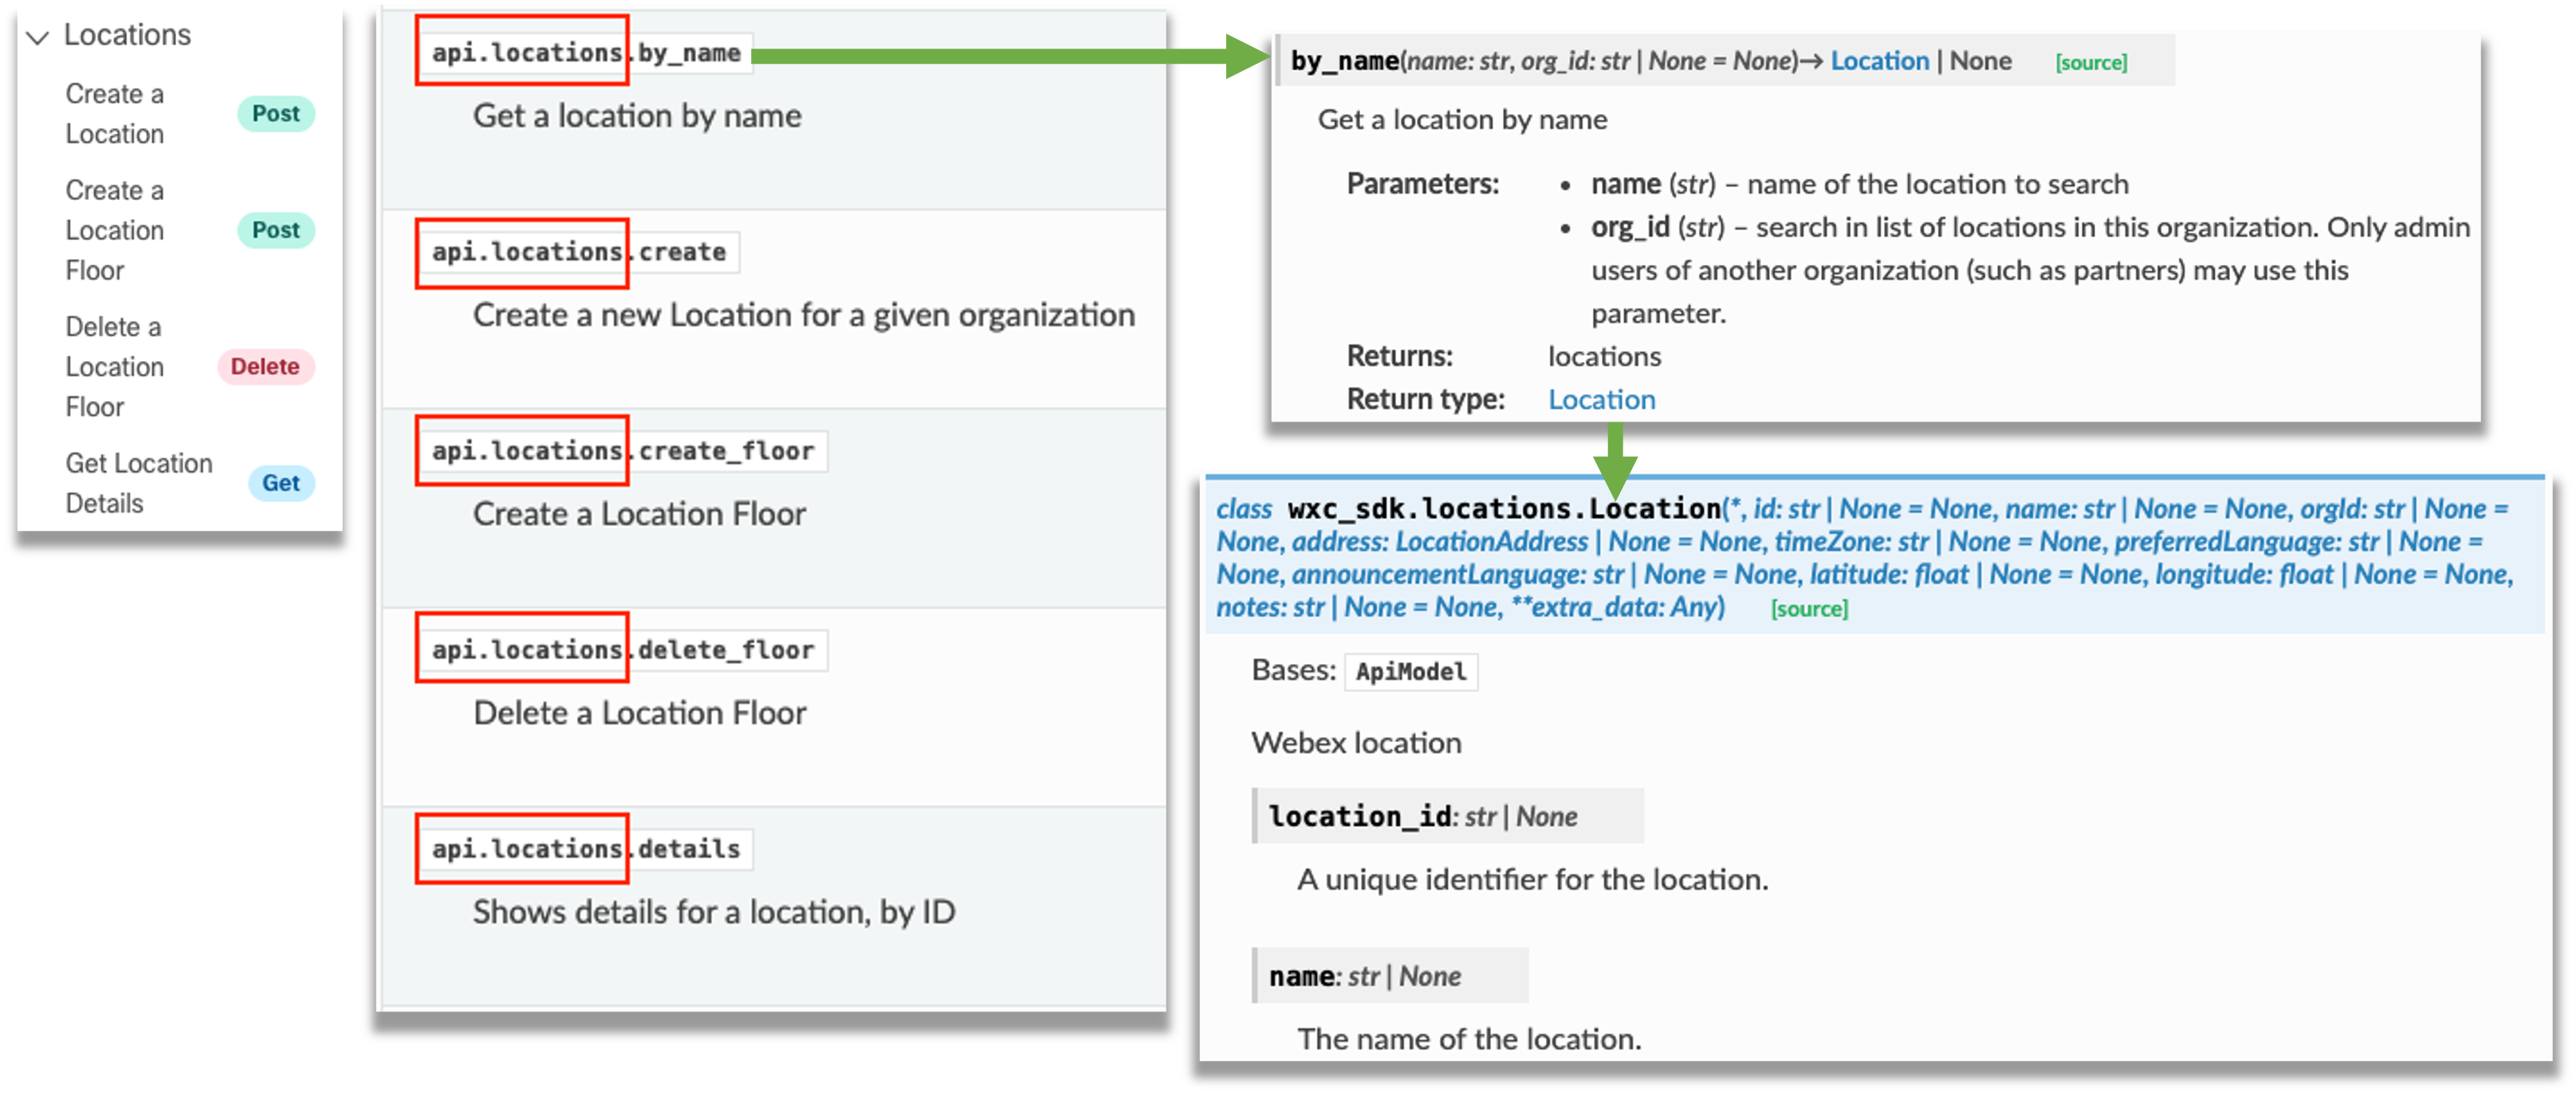
Step 2 - Look up a Location
You have seen how much of the Webex API documentation maps directly to methods in the wxc_sdk. Another handy
way to find a particular API endpoint exposed by the SDK is by using the
Reference of all available methods in the SDK.
If you look at this guide and search for "api.locations" you will find those methods. In this case, there
is an additional method not present in the Webex API, by_name(). This will allow you to
look up a location by name, instead of having to get a list of all locations followed by iterating through
the list to find the desired location.
Replace the ___REPLACE_WITH_LOCATION_NAME___ text in between the quotes with
Pod06
:
Use the by_name() method, passing it pod_loc_name.
Since you are now dealing with a Location
object, you can directly print the name and location_id attributes:
Click Start Debugging and examine the Terminal window output.
You see the location name and ID logged.
Step 3 - Update a Person
Now you have all the data you need to update a person to enable Webex Calling. To do this, you need to take
the existing user you retrieved earlier, add the license for Webex Calling, remove the on-prem registration
license, modify the location for the user, and then update the user. In our example, you have a
user that has their phone number already populated via Directory Connector when they were imported, so you
do not have to set it, but if you were doing this in an environment where you don't have the phone number
populated, you would have to populate this through the API call as well.
You already have the webex_user_det from an earlier query that contains all the user
details. As mentioned, this is a Person. One of the properties of this object is
the licenses attribute that is a list of strings. Each string is a license ID.
Since you retrieved the licenses for the "Webex Calling - Professional" and "Unified Communication Manager (UCM)" licenses
earlier, you can simply add to the list using the append() method and remove the UCM
license using the remove() method. The code first checks to see if the UCM license is present
before attempting to remove it as well as checking to make sure the Webex Calling license is not present before
adding it. This is to avoid attempting to remove something that is not there or add something that is already in the
list. Add the following to your code:
Modifying the location for the webex_user_det user is fairly trivial. The
People object has a location_id field that you can simply
assign the location ID you retrieved previously, webex_location.location_id.
Append the following:
Now you're ready to modify your user. Just like when requesting the person details, set
calling_data to true, or the location ID won't show up in the output.
Append the following:
Save this file
Click Start Debugging and examine the Terminal window output.
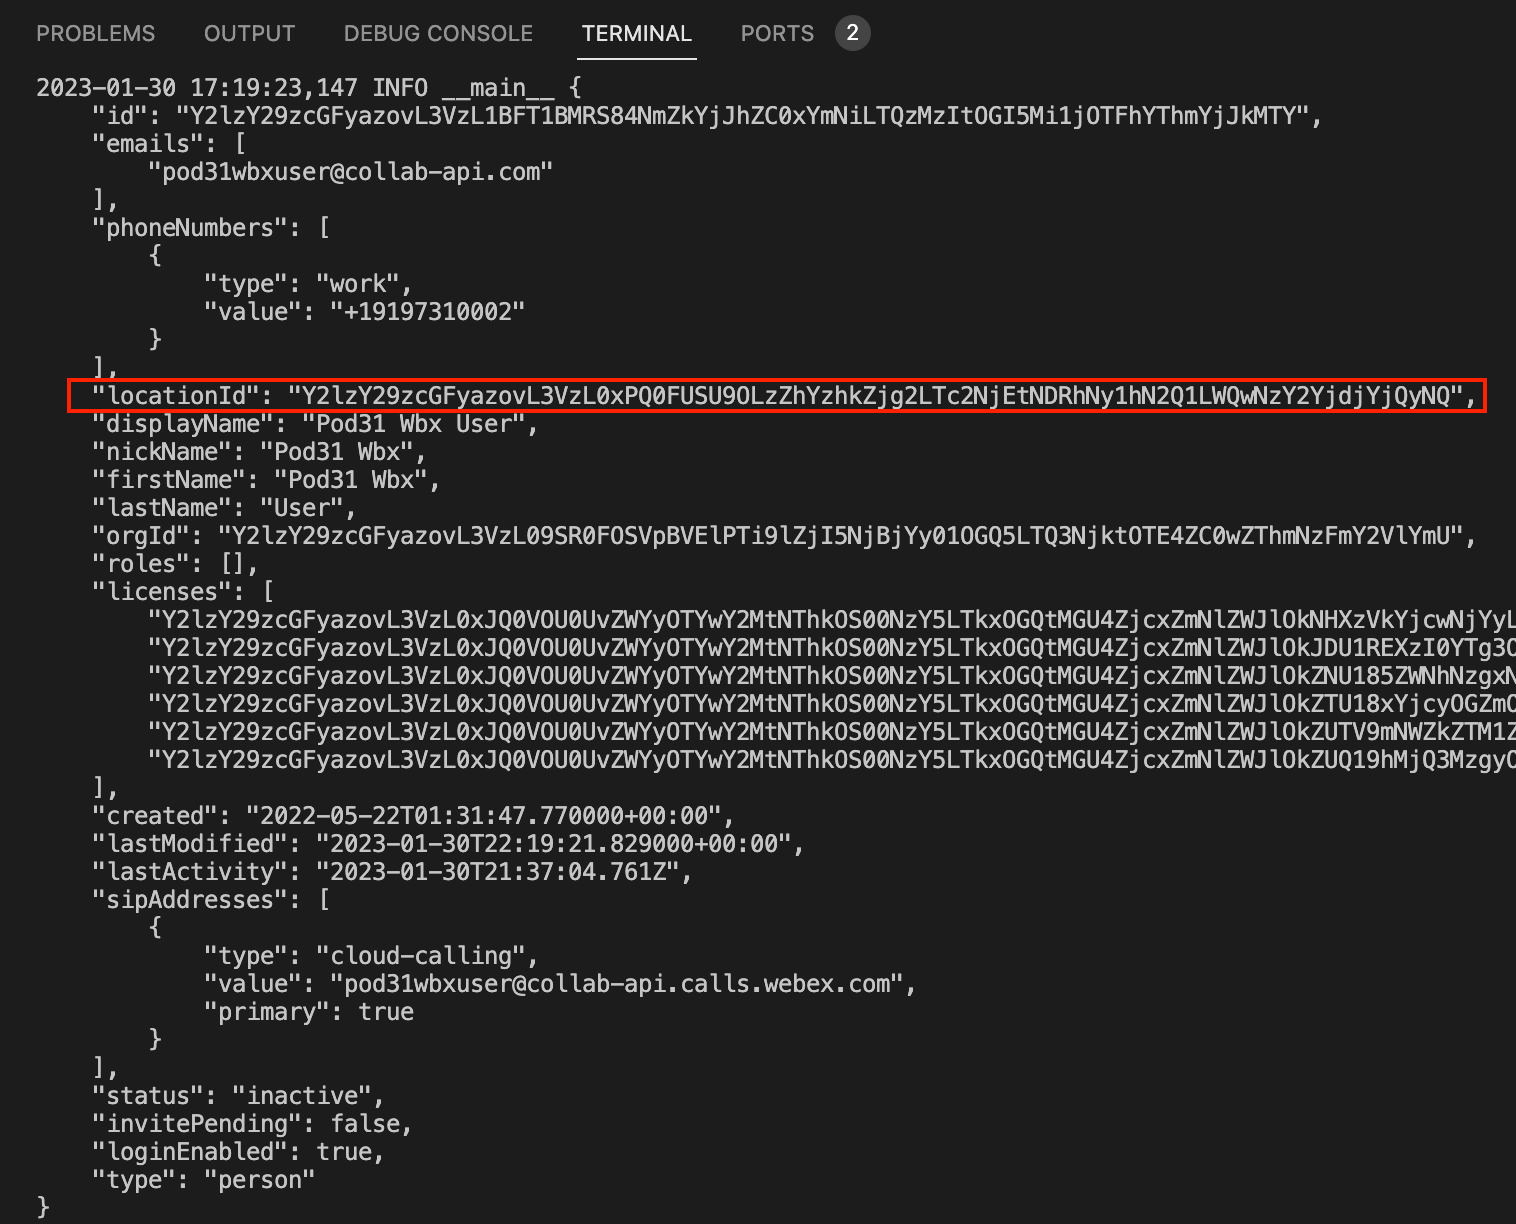
You see the complete user information returned and displayed.
The data returned is all the user information. For Webex Calling, the locationId is the
key component. You also see the phoneNumbers as well as a number of licenses
licenses entries, although they are only indicated via their object IDs.
If calling_data=True were not specified, you would not see any location ID field either.
Step 4 - Verify User is Enabled for Webex Calling
Now it is time to log into the Webex App with this user and make sure calling is provisioned.
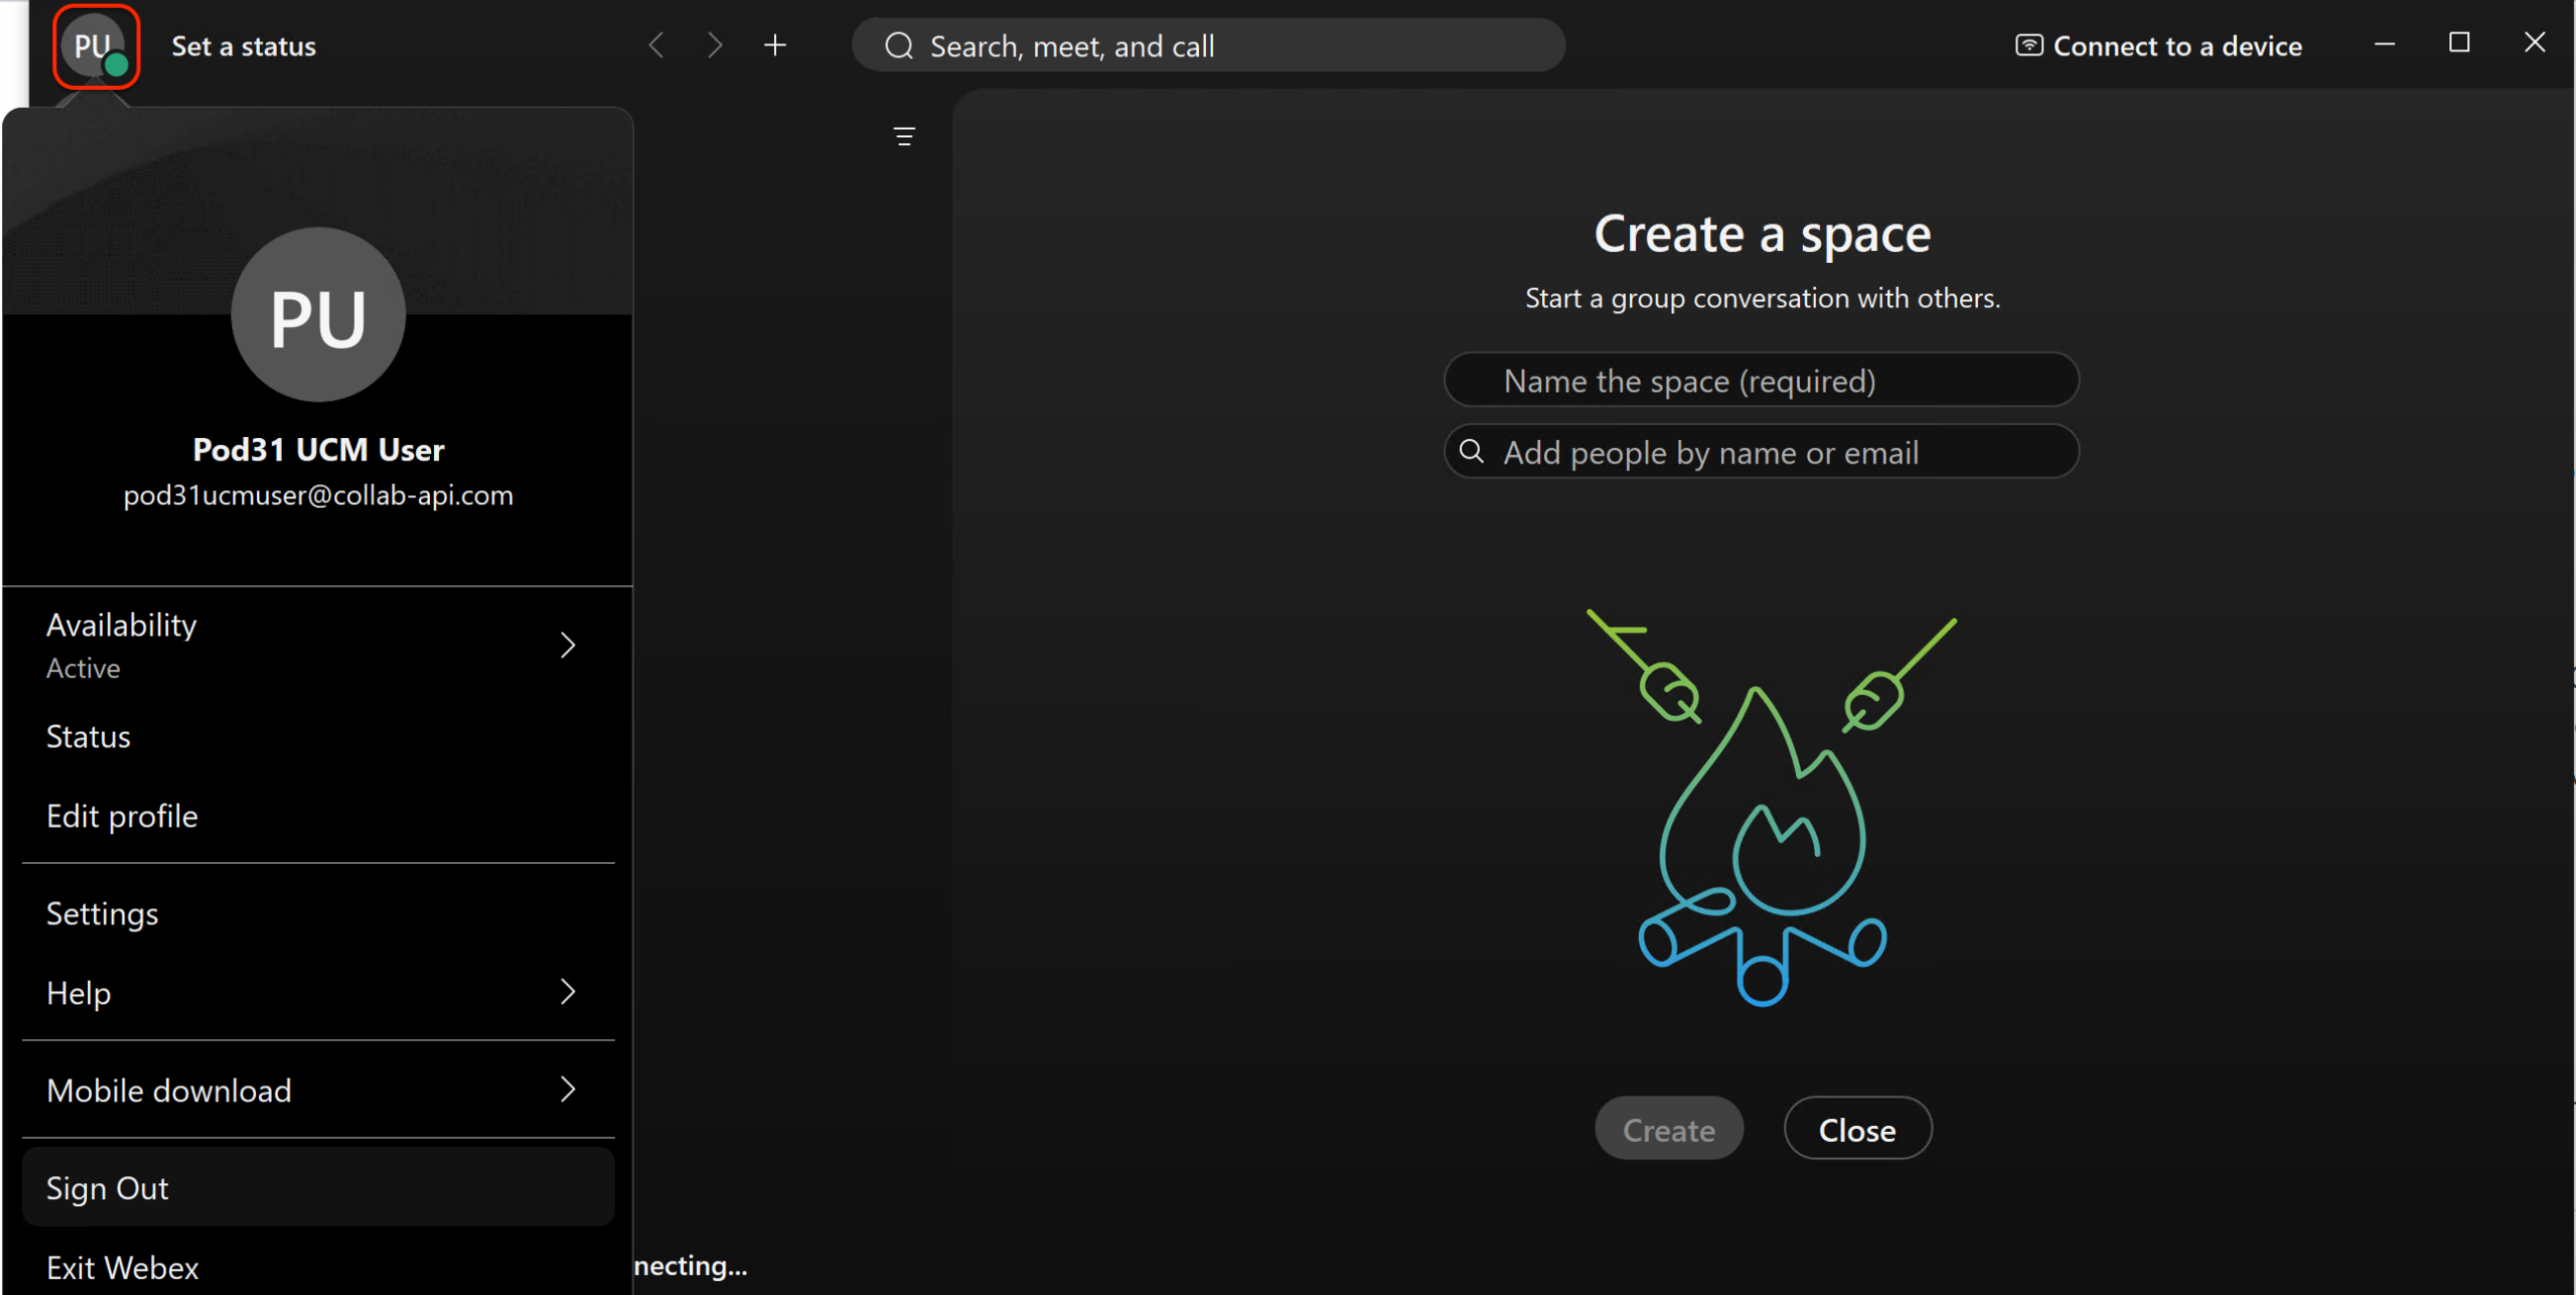
The Webex app should be already installed and running on your PC. If a user is signed in already first sign
out by clicking on the logged in user's profile and settings on the top left of the Webex Client application
window and select Sign Out.
Log in using email:
pod6wbxuser@collab-api.com
and password:
C1sco.123
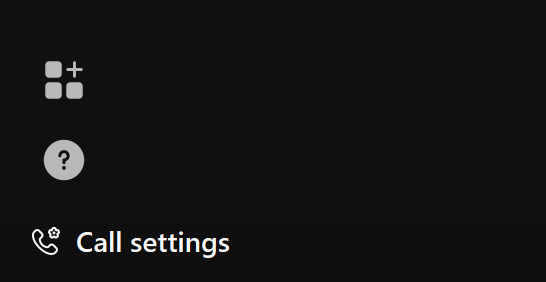
Once signed in, you should see the Call Settings in the bottom left corner. There should be no
"Phone services are disconnected" or similar errors.
Click the following to place a call: 2222.
If the call connects, you are successfully using Webex Calling
Now that you've worked with Calling-related APIs and the wxc_sdk Python library, it's time to look at the Webex Meetings APIs.

 =
=