To remotely connect to the lab using the VPN credentials that have been provided to you by your lab proctors using the native Windows VPN client, follow these instructions.
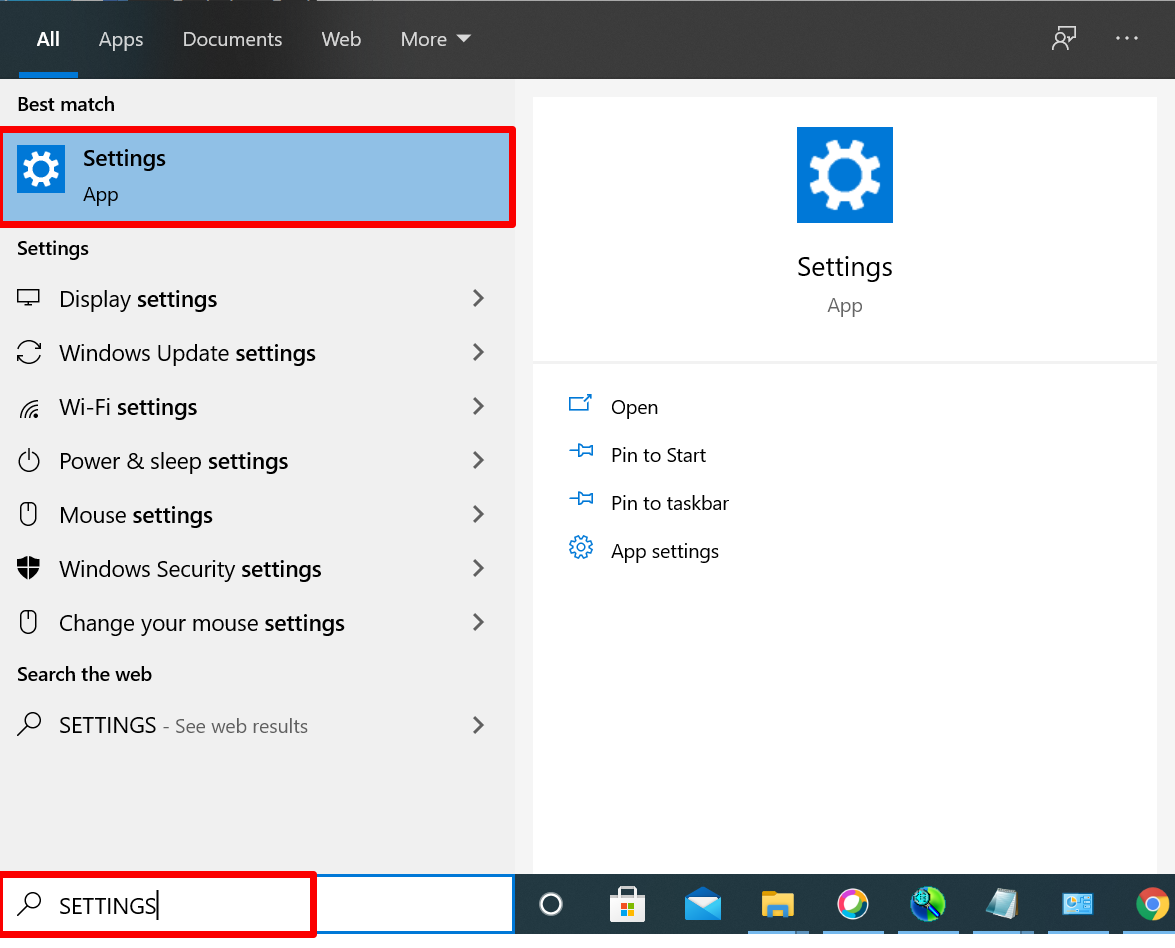
Step 1: Open Windows Settings by searching for settings in the Windows search box and select the Settings app.
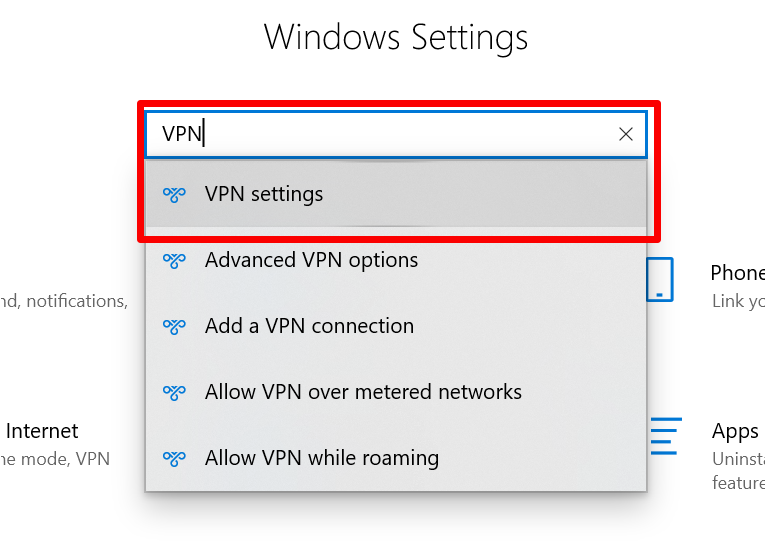
Step 2: Open VPN Settings by searching for VPN in the Windows Settings box and select VPN settings from the menu.
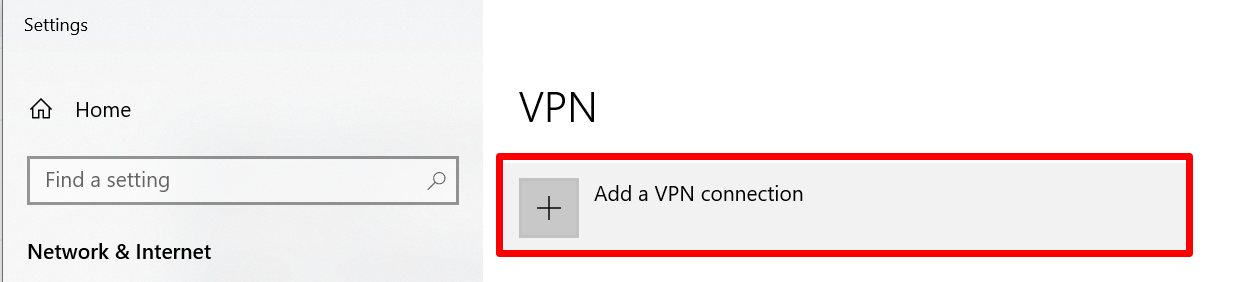
Step 3: Click the Add a VPN connection button.
Step 4: In the Add a VPN connection window, configure the following:

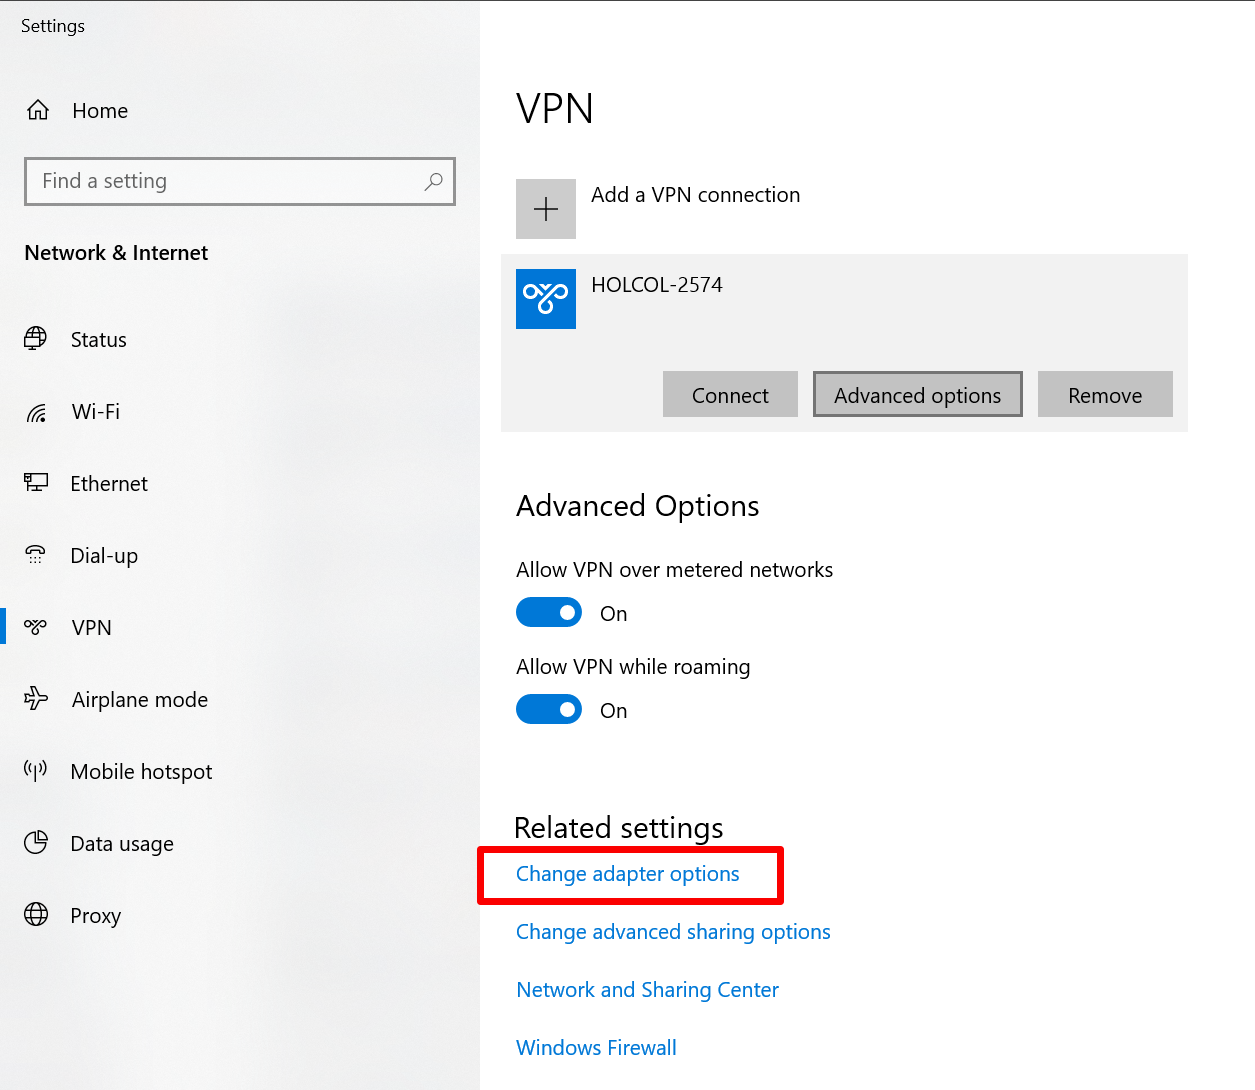
Step 5: You should now see a VPN profile for HOLCOL-2574, but you will not be able to connect yet. Click on Change adapter options.
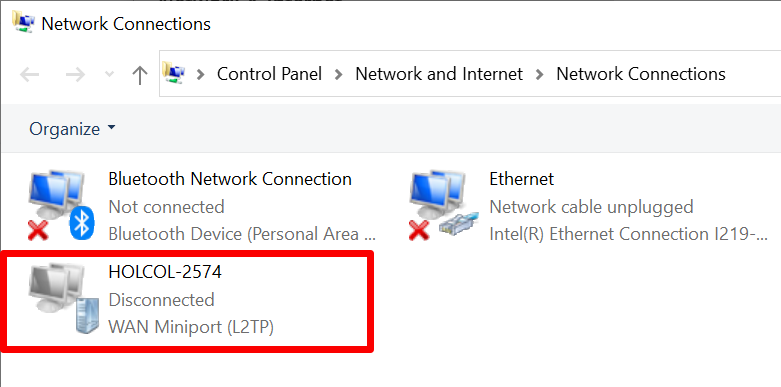
Step 6: The Network Connections window should appear. Right-click on HOLCOL-2564 and select Properties.

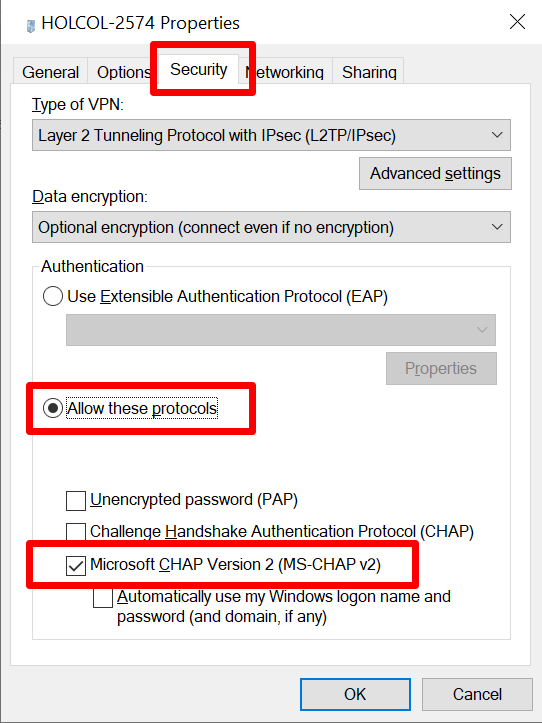
Step 7: In the properties window, select the Security tab, select the option for Allow these protocols and make sure only Microsoft CHAP Version 2 (MS-CHAP v2) is selected.
Step 8: To start the VPN connection, double-click on the HOLCOL-2574 icon in the Network Connections window.
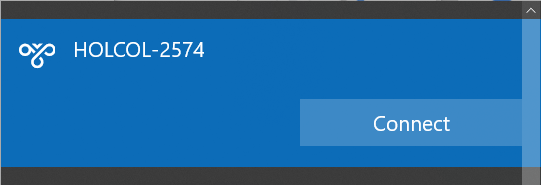
Step 9: A menu will pop up and at the top you should see a VPN option for HOLCOL-2574. Click the Connect button to initiate the VPN connection. If you did not provide your username and password when you configured the connection, you will be prompted to enter your username and password.
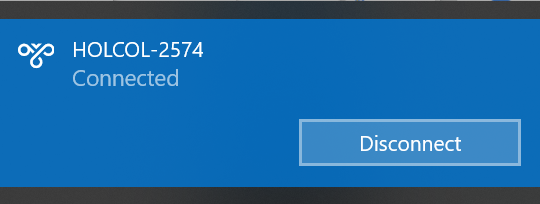
Step 10: Once connected, you can come to the same place to disconnect your connection.
You will be working on the lab inside of a PC in the lab with all the necessary software pre-installed. You will connect to this PC using a Microsoft Remote Desktop (RDC) connection. Windows comes pre-installed with the client. If you do not have the client for Mac, download it for free from the Mac App Store.
Once you have the RDP client installed, download this file for your Pod 6 lab PC: pod6-studentvm.rdp
Make sure that your VPN connection to the lab is up before double-clicking on the downloaded rdp file. You will be prompted for a password. Use c1sco123 for the password.
The lab manual is available in the web browser on your RDP session, however if you would like to view the lab manual on your local PC, you navigate to the lab manual for your pod 6 by clicking below. Please be sure to connect to the correctly assigned pod number: https://collabapilab.ciscolive.com/lab/pod6/intro/landing.